Deploying a Minimal Plumber API on DigitalOcean
Some quick notes on deploying an API (generated with plumber) on DigitalOcean.
Development Setup
On your local machine install a couple of packages from GitHub.
devtools::install_github("trestletech/plumber")
devtools::install_github("sckott/analogsea")
In RStudio open a new script and create a single, simple API endpoint which will return today’s date. Create a new folder (I’ll call mine api) and save the script in that folder as plumber.R.
#* @get /
function() {
  Sys.Date()
}
Then in the RStudio console, start the API on port 8000.
library(plumber)
r <- plumb("api/plumber.R")
r$run(port = 8000)
Starting server to listen on port 8000
Running the swagger UI at http://127.0.0.1:8000/__swagger__/You should then be able to access two endpoints via your browser:
http://127.0.0.1:8000/__swagger__/: the Swagger interface for your API andhttp://127.0.0.1:8000/date: the date endpoint defined above.
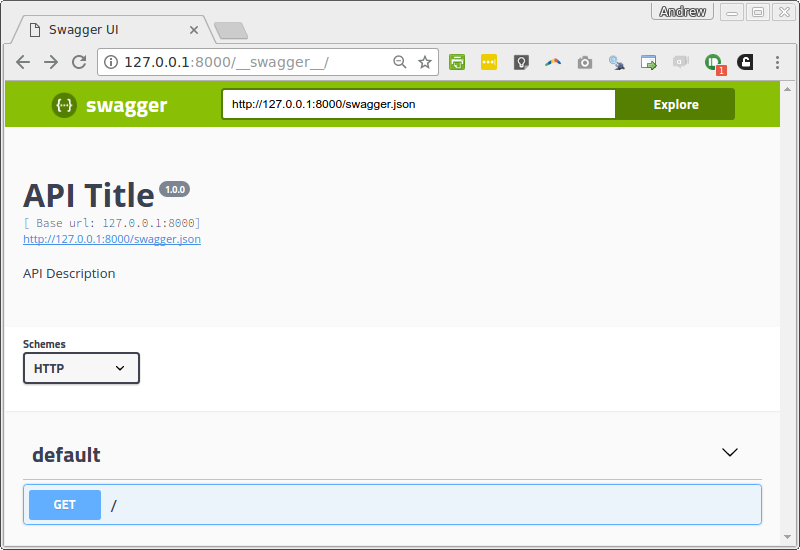
In the image below you’ll see the result returned from a GET request to that endpoint.

If you have the above working then all of the local development is done. It’s time to deploy.
DigitalOcean Preliminaries
Creat an account on DigitalOcean.

Provision a Test Droplet
The process of setting up a Droplet on DigitalOcean is made very simple with some functionality from plumber.
id <- do_provision()
id
<droplet>AppropriatedNuisance (52452158)
IP: 107.170.221.24
Status: active
Region: San Francisco 1
Image: 16.04.2 x64
Size: 512mb
Volumes:This will do a number of things:
- authenticate a connection between R and DigitalOcean;
- create an instance (or “Droplet”) on DigitalOcean;
- create a swap file;
- install a recent version of R;
- install the
plumberpackage; - configure the NGINX web server to route traffic from port 80 to your API;
- configure a firewall to only allow connections on ports 22 (SSH) and 80 (HTTP).
This will take a few minutes. Be patient.
Once it’s done, check your dashboard on DigitalOcean to confirm that a new instance has been created (it will have a plumber tag). Grab the associated IP address and open it in your browser. You should see the message “plumber is alive”, generated by the default (placeholder) API.
You can destroy this instance now from the dashboard. We just wanted to check that everything works.
Provision a Production Droplet
Now we are going to create another instance, but this time without the example API.
id <- plumber::do_provision(unstable = TRUE, example = FALSE)
analogsea::droplets()
$racently
$BolderCommissioner
<droplet>BolderCommissioner (52459432)
IP: 107.170.255.43
Status: active
Region: San Francisco 1
Image: 16.04.2 x64
Size: 512mb
Volumes: Here we see another way to get information on your instances using analogsea::droplets().
Deploy to a Production Droplet
It’s now a simple matter to deploy our date API to this instance.
do_deploy_api(id, "date", "./api/", 8000)
If you make changes to the code for the API they can be redeployed by simply running do_deploy_api() again.
Decommissioning a Droplet
Your instance on DigitalOcean is charged by the hour. When you are done it makes sense to destroy the instance. This is easily done via the dashboard.