Creating an Amazon Machine Image (AMI) makes it quick and simple to rebuild a specific EC2 setup. This post illustrates the process by creating an AMI with ethminer and NVIDIA GPU drivers. Of course you’d never use this for mining Ether because the hardware costs are still too high!
Spin Up an Instance
First we’ll need to create an EC2 instance. We’ll request a g2.2xlarge spot instance with the Ubuntu 16.04 base AMI. Once the request has been fulfilled and the instance is active we can connect via SSH.
ssh ubuntu@ec2-34-224-101-229.compute-1.amazonaws.com
Now the fun begins.
Installing Prerequisites
Update the APT cache.
sudo apt-get update -y
Install make, gcc and the kernel header files. We’ll need these to build the NVIDIA driver.
sudo apt-get install -y make gcc linux-headers-$(uname -r)
Installing NVIDIA Driver
Download the NVIDIA drivers and run the installer.
wget http://us.download.nvidia.com/XFree86/Linux-x86_64/367.106/NVIDIA-Linux-x86_64-367.106.run
sudo /bin/bash ./NVIDIA-Linux-x86_64-367.106.run
Accept the license conditions. There will be a couple of warnings, which you can safely ignore. Choose to run nvidia-xconfig. When the installer has finished, reboot.
sudo reboot
Obviously your connection will be broken during the reboot, so reconnect. Check that the drivers are installed and a GPU detected.
nvidia-smi -q | head
==============NVSMI LOG==============

Timestamp                           : Sun Dec  3 17:29:33 2017
Driver Version                      : 367.106

Attached GPUs                       : 1
GPU 0000:00:03.0
    Product Name                    : GRID K520
    Product Brand                   : Grid
Looks good!
Install ethminer
Next we’ll install ethminer. We could build it from source, but there’s a precompiled binary available too, so let’s go with that.
wget https://github.com/ethereum-mining/ethminer/releases/download/v0.12.0/ethminer-0.12.0-Linux.tar.gz
Unpack and move the binary into a location on the execution path.
tar -zxvf ethminer-0.12.0-Linux.tar.gz
sudo mv bin/ethminer /usr/local/bin/
Check that it works.
ethminer --version
ethminer version 0.12.0
Build: Linux/g++/Release
Clean Up
Before we create the AMI, quickly clean up the ubuntu home folder. No sense in leaving cruft lying around.
Create the AMI
The process of creating an AMI takes place on the EC2 dashboard, so head back there in your browser.
- Select Instances from the menu on the left and choose the instance that we’ve been working on.
- From the Actions dropdown, select Image and then Create Image.
- Give it a suitable name and description.
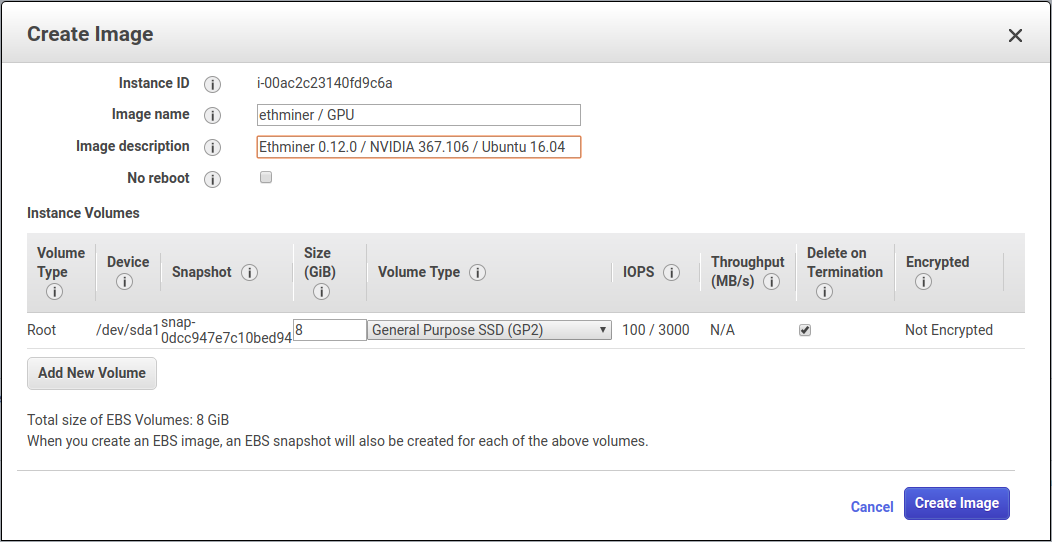
- Press Create Image.
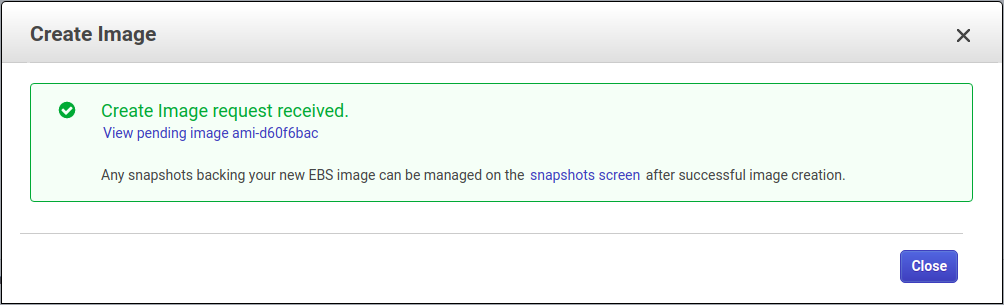
- Select AMIs from the menu on the left. The newly created AMI should now be listed.
- At this stage you can safely terminate the instance we’ve been working on.
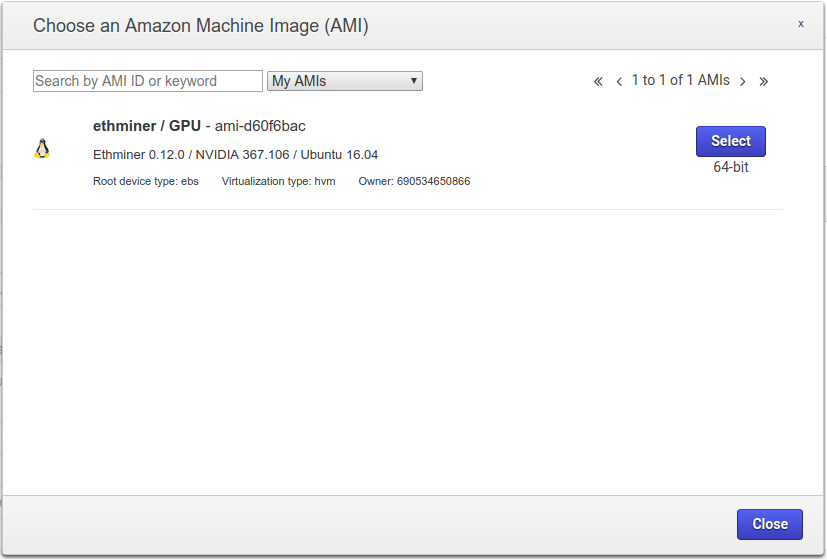
You can now easily create new EC2 instances provisioned with this freshly minted AMI.
Going Public
Unless you specifically want to keep your shiny new AMI to yourself, you probably want to make it publicly accessible.
- Select AMIs from the menu on the left. Choose your new AMI.
- From the Actions dropdown, select Modify Image Permissions.
- Change the radio button from Private to Public.
- Press Save.
Share it with your friends. Bask in the warm glow of making other people’s lives easier.
One thing to note: AWS will create a snapshot for this AMI and you will be billed for storage of this snapshot. It’s not prohibitively expensive, but it’s also not free.