An Application Load Balancer receives requests and distributes them across a selection of processing resources. These processing resources are divided into Target Groups (see previous post for how to set one up).
Creating an Application Load Balancer
We’re setting up a Flask API which is deployed as a Docker image and running on ECS. We’re going to create a load balancer which will accept requests on port 80 and route them to port 5000 on the API container.
- Go to the EC2 Console.
- Select Load Balancers in the menu bar.
- Press the button.
- Press the button under the Application Load Balancer option.
- Specify a name for the load balancer.
- Listeners
- Select HTTP. 📢 We’ll come back and add HTTPS once we have everything working!
- Availability Zones.
- Select the appropriate VPC.
- Select at least two availability zones (subnets).
- Press the button.
- Yes, we know it’s not secure. Chill!
- Press the button. These groups will enable the load balancer to accept requests on port 80 and relay these requests through to the target group.
- Add the
httpsecurity group (inbound TCP traffic on port 80). - Add the
exodussecurity group (all outbound traffic).
- Add the
- Press the button.
- From the Target group drop down select Existing target group.
- From the Name drop down select the target group created earlier. 📢 This target group should have an IP target type!
- Press the button.
- Nothing to do here for the moment.
- Press the button.
- Press the button.
At this point you have an Application Load Balancer which is connected to a Target Group. However, the Target Group does not have any registered targets. We’ll set that up next!
Service
Create a service on the appropriate ECS cluster.
- Press the button.
- Select the Fargate launch type.
- Choose the appropriate task definition.
- Press the button.
- VPC and security groups.
- Select the same subnets which were chosen for the Application Load Balancer.
- Choose the
flaskandexodussecurity groups.
- Load balancing.
- Select the Application Load Balancer option.
- Choose the load balancer created earlier.
- Container to load balance.
- Select the appropriate container and port combination.
- Press the button.
- Specify the
80:HTTPoption for production listener port. - From the Target group name drop down select the target group created earlier.
- Press the button.
- Press the button.
- Press the button.
Provisioning the new service will take a short while. The service will become active and spawn a task. Wait until the task has Running status.
Another version of the steps in this process can be found here.
Target Group Revisited
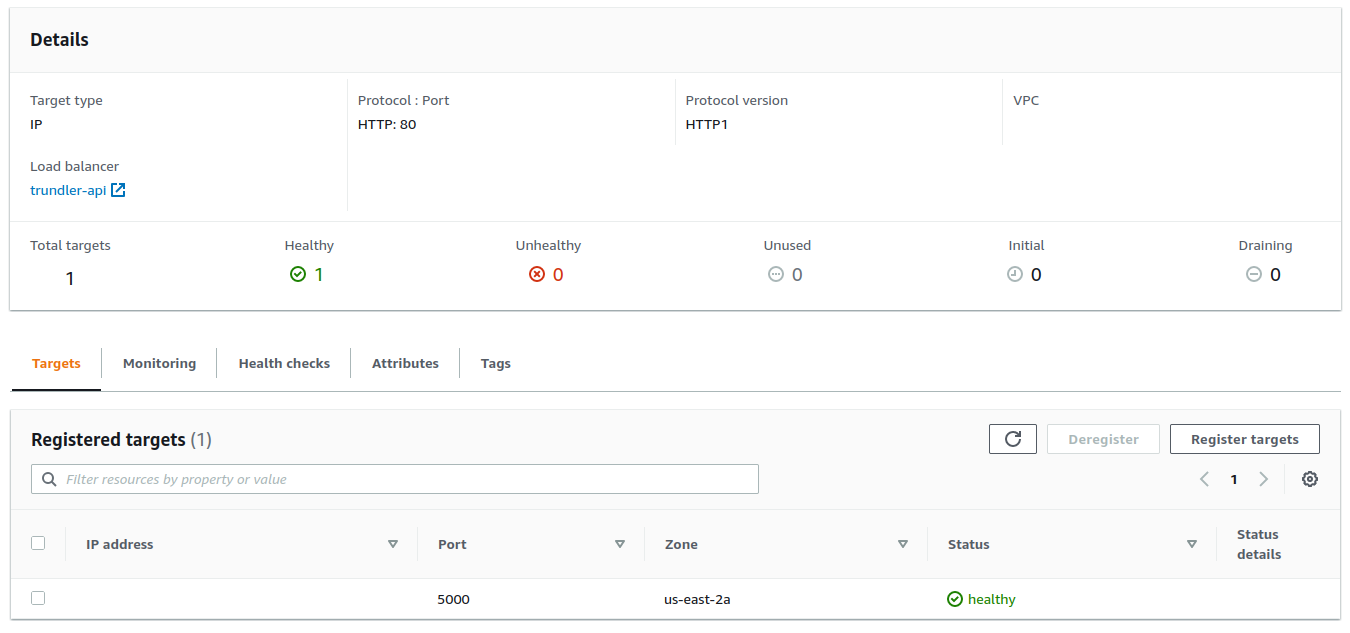
You can now go back to the Target Groups dashboard and select the entry that we created earlier. You should see that a new target has been registered.
Check on Load Balancer
Now head across to the Load Balancer dashboard. Select the item we created earlier. On the Description tab you will find a DNS name entry. Copy that and open it in a browser. Voila!