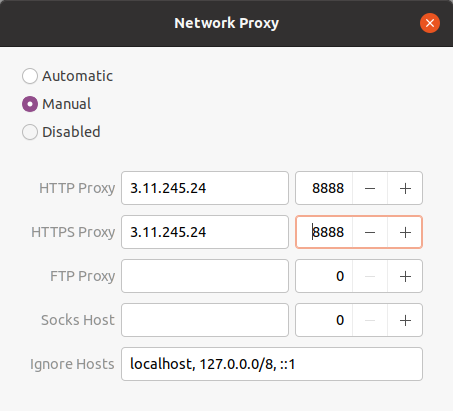
It’s often handy to have access to a HTTP proxy. I use this recipe from time to time to quickly fling together a proxy server which I can use to relay HTTP requests from a different origin.
EC2 Instance
Create an EC2 instance in the region you want the proxy to reside. You can go with the smallest instance available. I’m using a t3.nano.
Install an Ubuntu AMI.
If you are planning on keeping the proxy running indefinitely, then it will be a good idea to associate an Elastic IP address with this instance.
Install Tinyproxy
Connect to the EC2 instance via SSH and install Tinyproxy.
sudo apt-get update
sudo apt-get install tinyproxy
Restrict Access
Now you probably don’t want the proxy to be accessible to everybody, so lock it down to a specific selection of IP addresses.
Find the IP address of the machine that will have access to the proxy. You can either visit https://whatismyipaddress.com/ or run the following shell command.
curl ipecho.net/plain
3.91.59.140
Add a security group which allows access from this IP on port 8888.
You could be a lot more permissive and allow access on port 8888 from all IP addresses. But this might end in tears.
Configure Tinyproxy
Edit the configuration for Tinyproxy at /etc/tinyproxy/tinyproxy.conf.
Allowing Access from Nominated IP Addresses
Find the Allow section in the configuration file and add a line for the machine which will be accessing the proxy. Specify the IP address that you found earlier.
Allow 3.91.59.140
This setting should be consistent with whatever access you have permitted in the security group.
An alternative (and possibly more flexible) approach is to not define any Allow rules but handle access via security groups.

If you want to live dangerously then you can allow access from anywhere.
Allow 0.0.0.0/0
Be warned though, this too may end in tears.
Change Port
Another way to make the proxy somewhat more secure is to change the port from the default value of 8888. Edit the line in the configuration that looks like this:
Port 8888
Choose another (unused) port. Security through obscurity: choose a non-obvious port.
Basic Authentication
What about ensuring that only authenticated users have access to the service? No problem, just add a BasicAuth entry to the configuration file.
BasicAuth alice izlGVukLF8bSQuuzZKg
Restart
After the configuration has been adjusted, restart Tinyproxy.
sudo service tinyproxy restart
Test
Now test the proxy. Suppose, for example, that the proxy is running on a machine with IP address 3.11.245.24.
# Access HTTP(S) site via proxy (assuming no authentication required).
curl --proxy 3.11.245.24:8888 http://ipecho.net/plain
curl --proxy 3.11.245.24:8888 https://ipecho.net/plain

# Provide credentials for basic authentication.
curl --proxy alice:izlGVukLF8bSQuuzZKg@3.11.245.24:8888 http://ipecho.net/plain
In each case you should get back the IP address of the proxy server.
Once you’ve confirmed that it works, add it to the system or browser settings. You’re sorted! 🚀

Applications
Why would you want to use a proxy? The possible reasons are diverse. However, here’s an example: I know somebody who needs to apply for a National Insurance (NI) number in the UK. They are presently living in Estonia. The application page doesn’t work from Estonia, so I set up a proxy for them using the London (eu-west-2) region. 🚀 Problem solved.