
In a previous post I documented the process of setting up a GitLab Runner using the gitlab/gitlab-runner Docker image. As of GitLab Runner v16.0.0 the registration process has changed somewhat. This is an update to reflect that change.
⚠️ Update: These update still apply with the latest version of GitLab Runner (v17.4.0).
Start Runner Container
As before, the first thing that needs to be done is to create an instance of the GitLab Runner container. Ideally you’d do this on a small cloud server instance. I’ve found micro or nano AWS EC2 instances to be quite adequate.
docker run -d --name gitlab-runner --restart always \
    -v /srv/gitlab-runner/config:/etc/gitlab-runner \
    -v /var/run/docker.sock:/var/run/docker.sock \
    gitlab/gitlab-runner:v17.4.0
Breaking down the components of that command:
-d— launch container in the background;--name gitlab-runner— give the container a name for easy reference;--restart always— if the container terminates for some reason then always restart;-v /srv/gitlab-runner/config:/etc/gitlab-runner— mount/srv/gitlab-runner/configas a volume on the container (this means that configuration information is persisted if the runner is restarted); and-v /var/run/docker.sock:/var/run/docker.sock— give access to the host’s Docker daemon via thedockersocket.
Check that the container is running happily.
docker ps
CONTAINER ID   IMAGE                          STATUS         NAMES
594671285b14   gitlab/gitlab-runner:v16.0.1   Up 7 minutes   gitlab-runner
Generate a Token
Next you need to generate a token. The token will connect the CI/CD pipeline from a specific project (or group) to this runner.
Select the CI/CD option under Settings. Then expand Runners section and press the button.
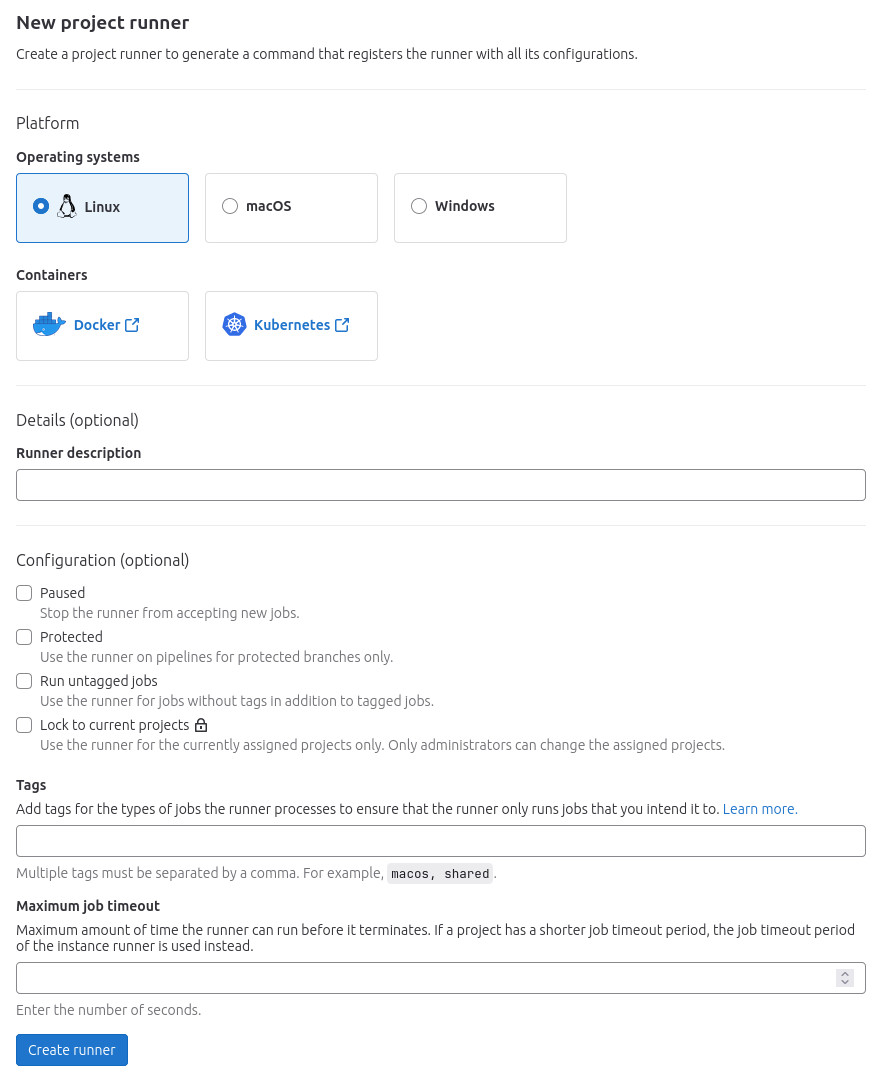
Fill out the new project runner form.
- Unless there is a strong reason to do otherwise, select Linux for Operating systems.
- Optionally give the runner a description.
- Check the Run untagged jobs configuration option. You can give particular tags for a runner, but I have never had the requirement for this.
Press the button. Copy the token. It will look something like glrt-yAA698rnKREsWKFzGTYS.
Register a Runner
Finally you can register the runner.
docker exec -it gitlab-runner gitlab-runner register
You’ll need to provide some information.
- The GitLab instance URL:
https://gitlab.com/(unless you are hosting your own GitLab). - The registration token acquired above.
- A name for the runner. Choose something distinctive because you might end up with a bunch of runners over time.
- An executor:
docker. - A default Docker image: I normally just go with
alpine.
The runner will be started and the configuration information will be stored in /etc/gitlab-runner/config.toml. Since /etc/gitlab-runner is volume mounted from the host, this file will be accessible directly from the host. It will look something like this:
concurrent = 1
check_interval = 0
shutdown_timeout = 0

[session_server]
  session_timeout = 1800

[[runners]]
  name = "test"
  url = "https://gitlab.com/"
  id = 23893876
  token = "glrt-GBPzBwXD9WwCpvzHqrXW"
  token_obtained_at = 2023-05-31T05:55:51Z
  token_expires_at = 0001-01-01T00:00:00Z
  executor = "docker"
  [runners.cache]
    MaxUploadedArchiveSize = 0
  [runners.docker]
    tls_verify = false
    image = "alpine"
    privileged = false
    disable_entrypoint_overwrite = false
    oom_kill_disable = false
    disable_cache = false
    volumes = ["/cache"]
    shm_size = 0
Back in GitLab press the button, which will take you to a page listing the freshly created runner.