
Gatsby is a modern, fast framework for building optimized, high-performance websites. It’s a static site generator that compiles a site into static files at build time. Under the hood it uses React (user interface library) and GraphQL (data query language).
Compared with tools like WordPress or Joomla, Gatsby feels a lot more technical and less user-friendly. The learning curve is steeper and it takes longer to get things set up. However, the reward is more flexibility and granular control over all aspects of the site.
This post runs through the steps for setting up a minimal Gatsby site.
🚀 TL;DR
Show me the code. Look at the 0-starter branch.
Setup
To work with Gatsby you’ll need to have a working installation of Node.js. I prefer instead to use a Docker image and I’d encourage you to do the same in the interests of getting things up and running with minimal hassle.
To pull the Docker image:
docker pull datawookie/gatsby:latest
The content in this post was tested with the 20.8.0 version of the image.
Clone Starter Site
The complete code for this post can be found here. It’s derived from the Gatsby Starter Default repository. We’ll start by cloning that repository.
git clone git@github.com:gatsbyjs/gatsby-starter-default.git
cd gatsby-starter-default
Development
Before we make any changes we’ll fire up a development server.
docker run -it -p 8000:8000 -v ${PWD}:/site --name gatsby datawookie/gatsby:latest
There are a lot of options in that command. A quick explanation:
-it— make the container interactive on the terminal (so it’s easy to stop!);-p 8000:8000— share port 8000 from the container as port 8000 on the host;-v ${PWD}:/site— mount the current folder on the host at/siteon the container;--name gatsby— give the container a name so that it’s easy to identify; anddatawookie/gatsby:latest— the name of the Docker image.
Go to http://localhost:8000/ in your browser to see the basic starter site.
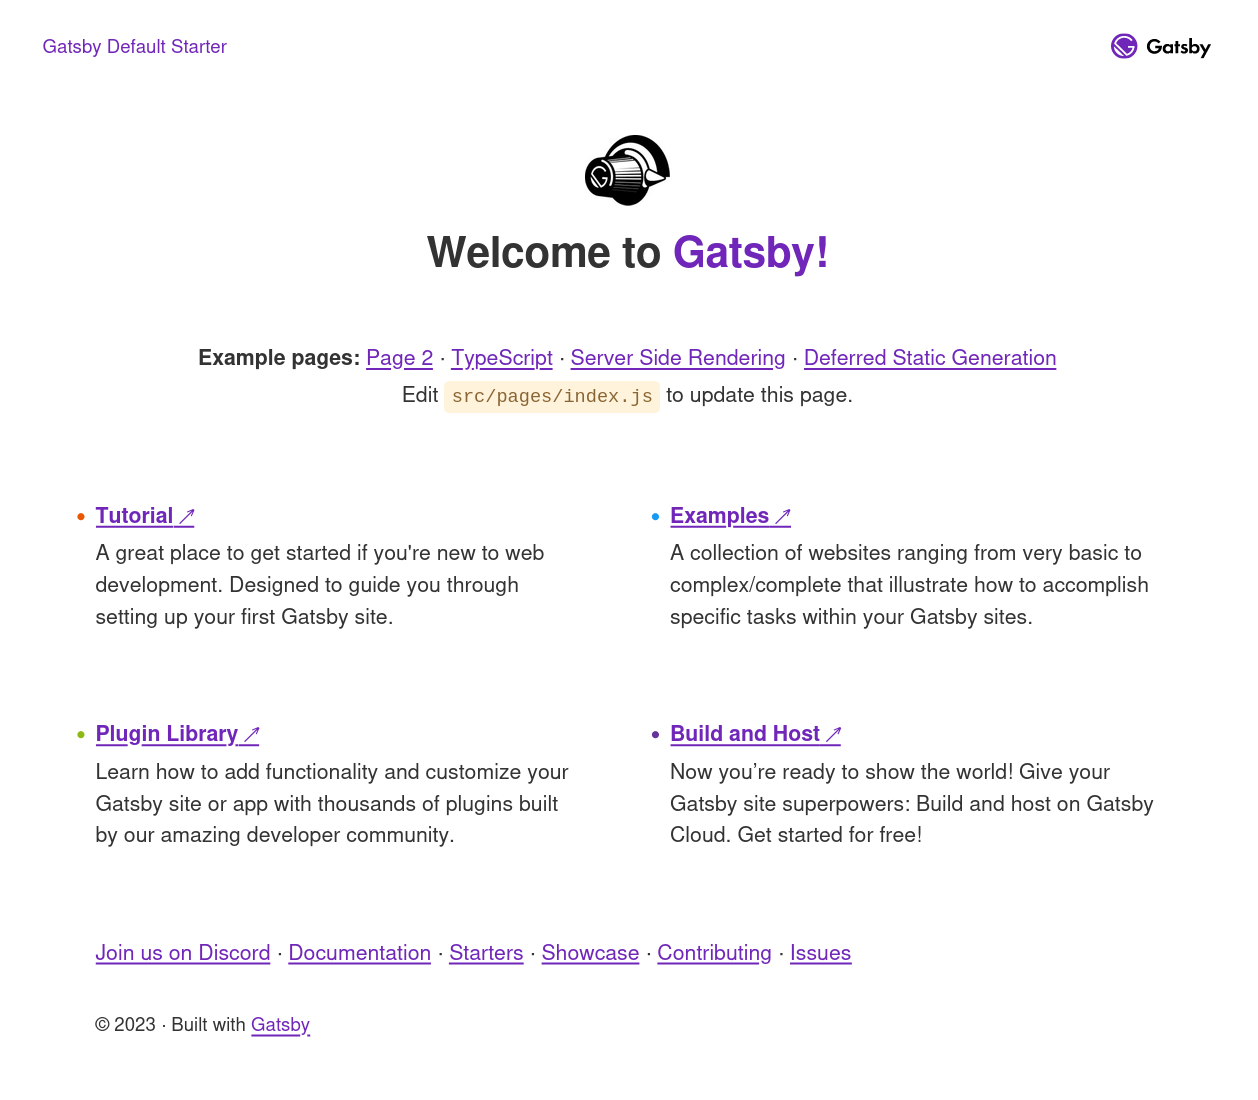
Project Structure
Let’s take a look at the structure of the project. Most of the interesting stuff lies below the src/ folder.
├── gatsby-browser.js
├── gatsby-config.js
├── gatsby-node.js
├── gatsby-ssr.js
├── gatsby-starter.code-workspace
├── LICENSE
├── package.json
├── package-lock.json
├── README.md
├── src
│   ├── components
│   │   ├── header.js
│   │   ├── index.module.css
│   │   ├── layout.css
│   │   ├── layout.js
│   │   └── seo.js
│   ├── images
│   │   ├── example.png
│   │   └── gatsby-icon.png
│   ├── pages
│   │   ├── 404.js
│   │   ├── index.js
│   │   ├── page-2.js
│   │   ├── using-ssr.js
│   │   └── using-typescript.tsx
│   └── templates
│       └── using-dsg.js
└── yarn.lock
A lot of files for a simple site. Below are explanations of the most important files.
package.json— information about the project, dependencies (generally with version ranges) and scripts;package-lock.json— specific information dependencies about dependencies and dependency relationships;gatsby-config.js— site configuration (site title, description, and plugins);gatsby-node.js— executed when the site is built (can be used to generate data, create pages, or customize the build process);gatsby-browser.js— executed when the site is rendered in the browser (can be used to add functionality such as routing, analytics, and interactivity);gatsby-ssr.js— executed when the site is rendered on a server (can be used to generate static HTML files or provide a server-rendered version of the site);index.js— the code for the homepage; andstatic— folder containing static assets (images, fonts, and CSS).
💡 The SSR in gatsby-ssr.js stands for Server-Side Rendering, a technique for rendering web pages on the server before they are sent to the browser.
Project Updates
We’ll make some updates to the project.
Upgrade Packages
We can use npm outdated to find packages that can be upgraded. And, while we’re about it, let’s lock down specific versions of packages in package.json. Using *, ^ and ~ to give some flexibility in package versions in great. However, IMHO, specific package versions are less likely to lead to trouble.
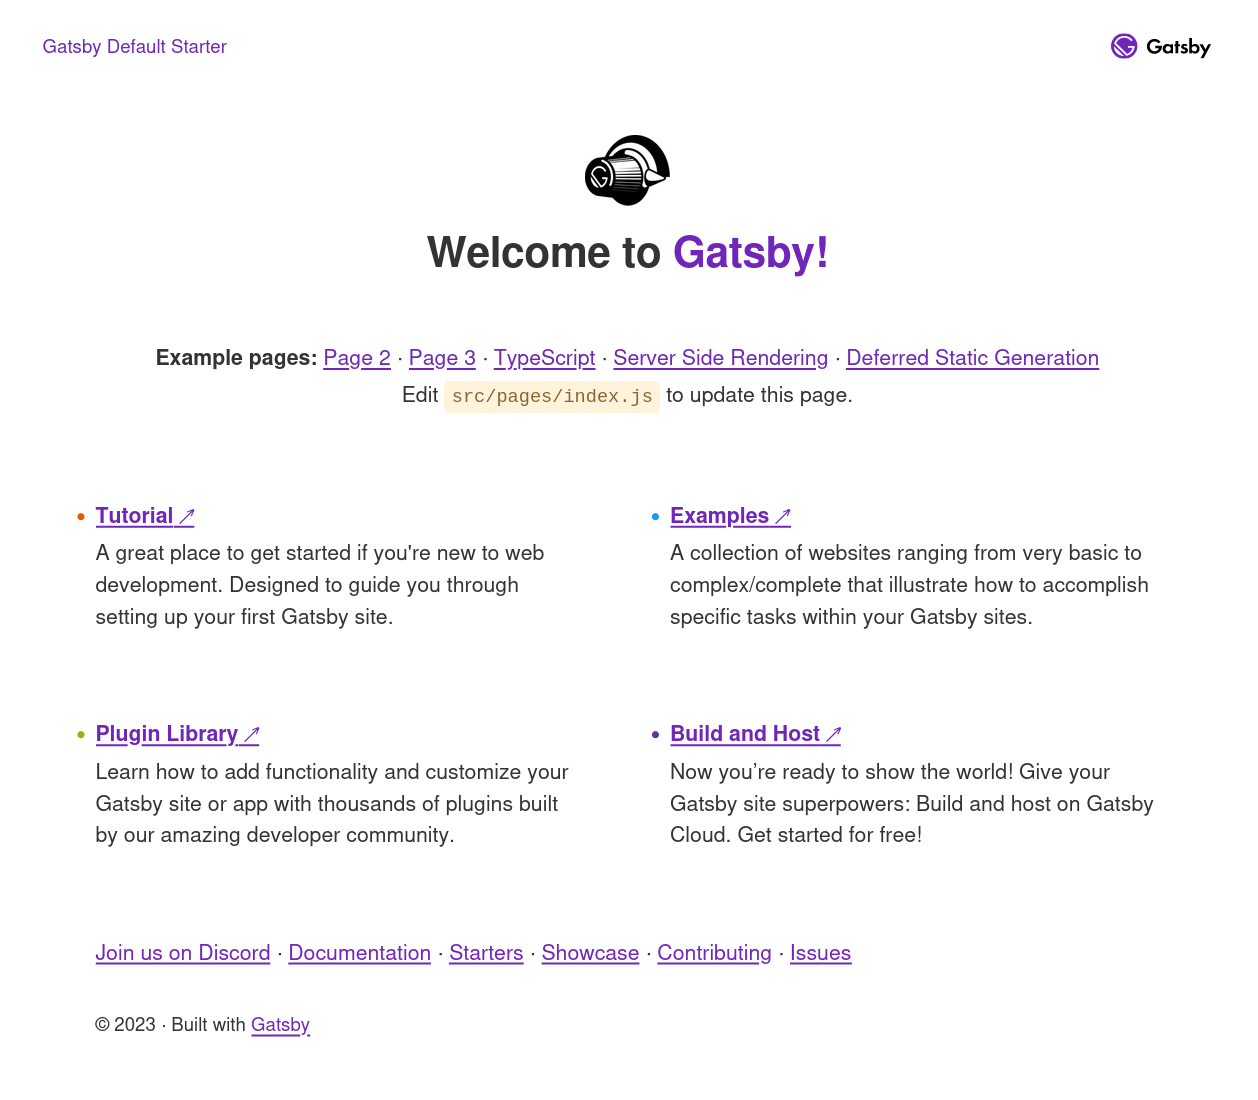
Add a Page
Let’s add a third page to the site.
- Go into the
src/pagesfolder. - Copy
page-2.jstopage-3.jsand make some rudimentary updates to that file. - In
index.jsadd another entry to thesamplePageLinksarray (just copy and update the entry for the second page).
With the development server running the site should be immediately updated. A new link will appear on the homepage.
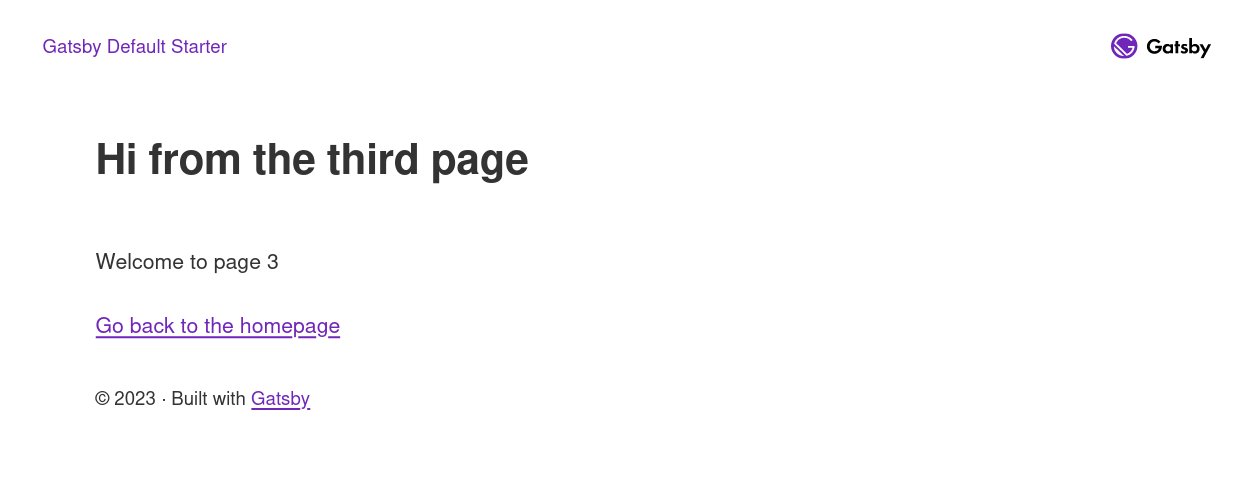
And if you click through on that link then you get to the newly added page.
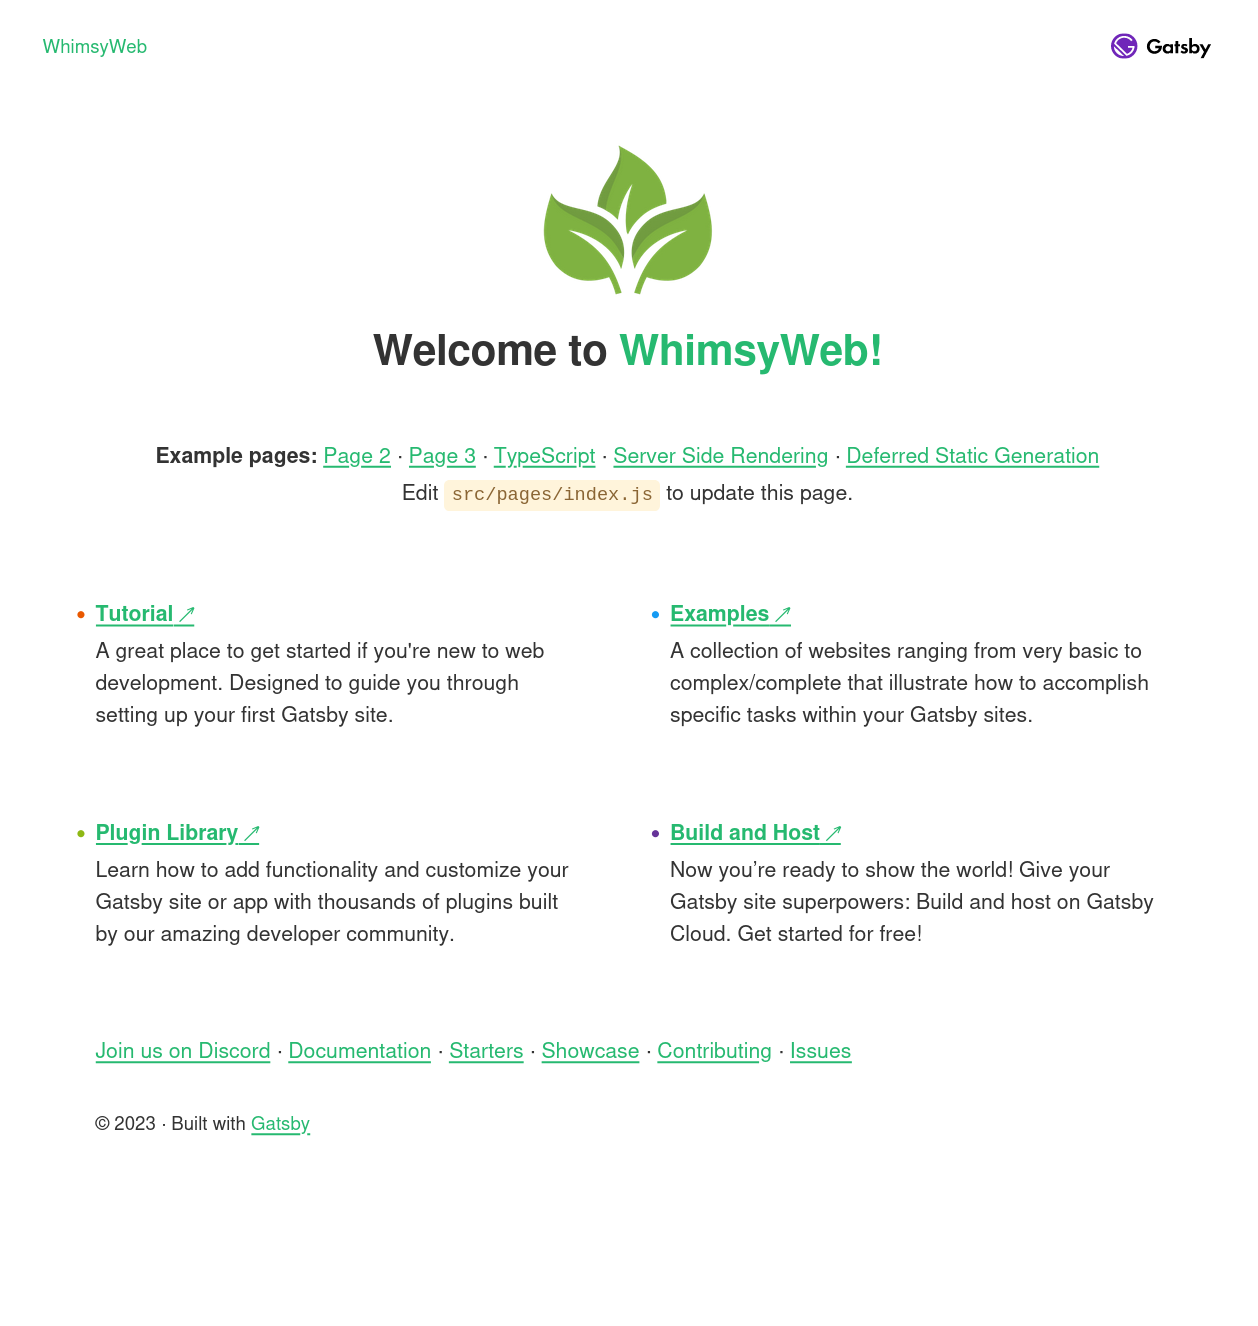
Site Title
Edit gatsby-config.js and change the value for title in siteMetadata. We’ll change that to “WhimsyWeb”. You can also change description, author and siteUrl while you are here.
Logo
Grab a new logo and use it to replace example.png in src/images. Update index.js in src/pages to use this image.
Styling
CSS updates can be made via the layout.css file under src/components. We’ll change the colour assigned to --color-primary to a nice shade of green (my aesthetic appreciation is questionable at best).
This is what the updated site looks like.
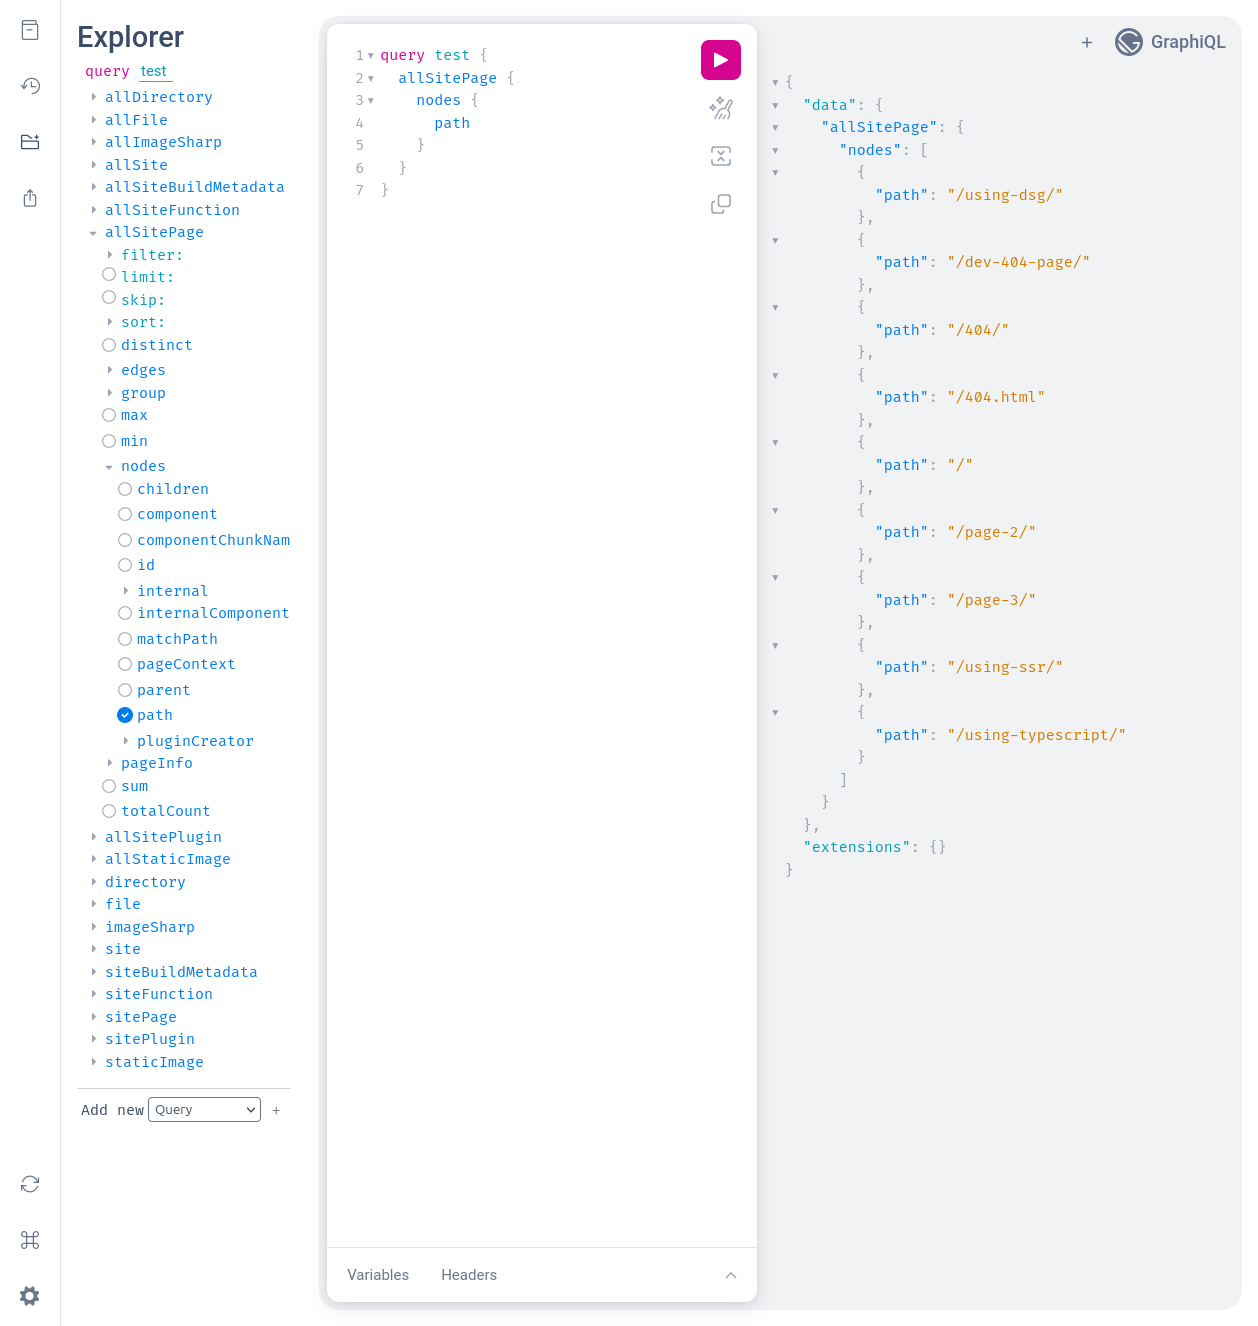
GraphQL
Gatsby uses GraphQL extensively. Browse to http://localhost:8000/___graphql to enter the GraphiQL interface, which allows you to construct and execute GraphQL queries.
Build
The development server is ideal for when you are adding content and working on the structure of the site. It updates in real time and you can immediately (or with a short delay) see the results of your changes.
However, to deploy the site you will need to make a production build.
docker run -v ${PWD}:/site datawookie/gatsby:20.8.0 build
The built site will be located under public/. This is what would be deployed if you were to put the site on a server.
Serve
Now you can serve the built site.
docker run -p 9000:9000 -v ${PWD}:/site datawookie/gatsby:latest serve
Go to http://localhost:9000/ to browse the built site.
Conclusion
We started with the Gatsby Starter Default project and made some tweaks to the site content. We used a Docker image to create a development server for the site, which automatically updated when changes were made. Finally we used the same Docker image to build and serve a production-ready version of the site.