Hugging Face hosts an enormous repository of Machine Learning models. For consumers, it’s a place to discover and download models, while model developers use it to publish, version, document and share their work. In addition to the model repository, Hugging Face also hosts datasets, provides cloud-based inference services and is developing a collection of Open Source packages including:
transformersdiffuserstokenizerstrlsmolagentsandhuggingface_hub, a Python package and CLI for interacting with their model repository.

Using an Ollama model, either locally or in the cloud, feels rather simple. You install the client, choose a model, then run ollama pull and ollama serve, and immediately you’re chatting with the model. The analogous process for Hugging Face models is more complicated. But that’s not going to deter us. Let’s dig in!
Hugging Face CLI Setup
Use the Hugging Face CLI, hf, to pull models from their repository. It’s part of a Python package, but the CLI is simpler to install and use. It works on Linux, macOS or Windows, but as a Linux partisan I’m only going to focus on that option.
Installing the Hugging Face CLI
Full installation instructions can be found here. This is the direct route to get started with minimal fuss. Simply download and run the installer script. 🚨 Make sure that you have the python3-pip and python3-venv packages installed first.
curl -LsSf https://hf.co/cli/install.sh | bashThe hf executable will be installed under ~/.local/bin. That directory should already be in your PATH. If not, then add it immediately! Check that it works.
hf --versionGet a list of the available commands.
hf --helpThere are a bewildering bunch of commands. We’ll only be using auth and download here.
Authenticating the Hugging Face CLI
If you haven’t yet created a Hugging Face account then now is a good time to do it. It’s not required for downloading most public models, but it’s necessary for private and gated models that require you to accept a license. You’ll get higher download rate limits and have the ability to upload your own models and datasets.
Use the auth command to log in. It’ll give you the option of opening a browser window and asking you to enter your credentials or pasting an access token.
hf auth loginConfirm that you’re logged in.
hf auth whoamiAlternatively, you can use an authentication token.
- Login to your Hugging Face account.
- Click your profile image (top/right) and select the Access Tokens item in the menu.
- Click the Create new token button.
- Specify in a token name.
- Select from available presets. I’d suggest Read-Only for starters.
- Click the Create token button.
- Copy the token.
- Add it to your environment.
# 🚨 This token has been invalidated!
export HF_TOKEN="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"
Pulling Models
Before you can run or serve a model from your local machine you need to download (or “pull”) it from the Hugging Face repository. The hf CLI provides a download command for that purpose. Browse around the model catalog and find a model that you want to try.
I’ll start by grabbing the Qwen/Qwen3-4B-GGUF model. You need to specify the model ID, which is the last two parts of the URL:
- the username or namespace (for example,
Qwen) and - the model name (for example,
Qwen3-4B-GGUF).
hf download Qwen/Qwen3-4B-GGUFThe model will be downloaded into a local model cache, usually under ~/.cache/huggingface/hub. You can specify an alternative location with the --local-dir option if you want to keep the files elsewhere. But unless there’s a strong reason for doing otherwise, I’d stick with the default.
It’s instructive to take a look at what gets downloaded. A separate directory is created for each model with three sub-directories:
refs/— Mappings from branch or tag names to commit hashes. Hugging Face uses Git to manage model versions and the hashes are the unique, immutable identifiers for specific model versions.blobs/— The actual model files, named by their content hash. You’ll find two types of hash here, both are chunky hexadecimals: SHA256 (64 character name; big files in Git’s large file storage) and SHA1 (40 character name; small file stored directly by Git).snapshots/— Symbolic links to the actual model files. These map file names to the content ofblobs/.
For the Qwen/Qwen3-4B-GGUF model, the refs/ and snapshots/ directories are just a few KiB, but blobs/ directory is 15 GiB. Why so big? Because it contains multiple quantisations of the same model:
Qwen3-4B-Q4_K_M.gguf— 2.4 GiB; 4-bit quantisation with K-quants and mixed precision.Qwen3-4B-Q5_0.gguf— 2.7 GiB; 5-bit quantisation, no K-quants.Qwen3-4B-Q5_K_M.gguf— 2.7 GiB; 5-bit quantisation with K-quants and mixed precision.Qwen3-4B-Q6_K.gguf— 3.1 GiB; 6-bit quantisation with K-quants.Qwen3-4B-Q8_0.gguf— 4.0 GiB; 8-bit quantisation, no K-quants.
I could (and should!) have been more specific and only downloaded a specific quantisation. That’s a load of wasted bandwidth I won’t get back. How? Get a list of available files:
hf download Qwen/Qwen3-4B-GGUF --include "*.gguf" --dry-runFILE SIZE
-------------------- ----
Qwen3-4B-Q4_K_M.gguf -
Qwen3-4B-Q5_0.gguf 2.8G
Qwen3-4B-Q5_K_M.gguf 2.9G
Qwen3-4B-Q6_K.gguf 3.3G
Qwen3-4B-Q8_0.gguf 4.3GUse the --include parameter to filter only the one that you want.
hf download Qwen/Qwen3-4B-GGUF --include "*Q5_K_M*"For comparison I’ll also download an unquantised version of the same model.
hf download Qwen/Qwen3-4BThat only amounts to around 7.5 GiB on disk. The comparison is not entirely fair. Before I downloaded multiple quantised models. Individually each of those models is appreciably smaller than the unquantised model. This is not surprising, they are compressed models. 📌 If you only want a specific quantised model then don’t download them all!
Server Setup
There are multiple ways to serve Hugging Face models. I’ll use llama.cpp and vLLM.
llama.cpp is a runtime for LLM inference implemented in C/C++ with no external dependencies. It’s suitable for small models on ordinary hardware, and provides both a CLI client and a server. As the name suggests llama.cpp started with Meta’s LLaMA models, but grew to support many model families, quantisation formats and hardware backends. It’s also the inference engine behind Ollama.
vLLM is another LLM inference engine implemented mostly in Python with C++/CUDA for the performance-critical bits. It’s intended for GPU servers and uses a KV cache to efficiently manage memory so that multiple requests can comfortably run simultaneously.
When an LLM generates a token, it needs to weigh that token against all of the tokens previously generated. Done naively, this means repeating the same calculations for the whole conversation on every single new word. Inevitably this gets slower and slower as the text get longer.
KV (or Key-Value) caching avoids the repeated work. The LLM stores the key and value vectors it computes for each token in a cache, then appends new tokens to that cache. The result is generation at a roughly constant speed instead of degrading the longer a conversation runs.
The trade-off is memory: the cache grows with every token added, so longer context windows mean more memory set aside to hold it.
Read this for a deeper explanation.
Comparing the two options, llama.cpp is ideal for simple, local inference, using quantised models and CPU or mixed CPU/GPU execution, while vLLM is more naturally a server-side engine. They both expose an API that conforms to the OpenAI specification, but they’re tuned for different jobs.
CPU Setup
See this post for instructions on setting up llama.cpp for CPU inference.
GPU Setup
For GPU hardware I fired up a g4dn.xlarge EC2 instance with 4 vCPUs, 16 GiB RAM and an NVIDIA T4 GPU (16 GB of VRAM). An Ubuntu Deep Learning AMI comes with the NVIDIA driver pre-installed. It also has Python 3.12.3.
Use the nvidia-smi utility to confirm that the GPU is present and working.
nvidia-smiSat Jul 11 04:50:32 2026
+-----------------------------------------------------------------------------------+
| NVIDIA-SMI 595.71.05 Driver Version: 595.71.05 CUDA Version: 13.2 |
+-----------------------------------+------------------------+----------------------+
| GPU Name Persistence-M | Bus-Id Disp.A | Volatile Uncorr. ECC |
| Fan Temp Perf Pwr:Usage/Cap | Memory-Usage | GPU-Util Compute M. |
| | | MIG M. |
|===================================+========================+======================|
| 0 Tesla T4 On | 00000000:00:1E.0 Off | 0 |
| N/A 40C P0 34W / 70W | 0MiB / 15360MiB | 0% Default |
| | | N/A |
+-----------------------------------+------------------------+----------------------+
+-----------------------------------------------------------------------------------+
| Processes: |
| GPU GI CI PID Type Process name GPU Memory |
| ID ID Usage |
|===================================================================================|
| No running processes found |
+-----------------------------------------------------------------------------------+Setting up servers for GPU inference requires some system packages. You might already have these installed, but I’ll include them for completeness.
sudo apt update
sudo apt install -y nvidia-cuda-toolkit python3-pip python3.12-venv
Confirm that the CUDA toolkit is installed.
nvcc --versionnvcc: NVIDIA (R) Cuda compiler driver
Copyright (c) 2005-2023 NVIDIA Corporation
Built on Fri_Jan__6_16:45:21_PST_2023
Cuda compilation tools, release 12.0, V12.0.140
Build cuda_12.0.r12.0/compiler.32267302_0See this post for instructions on setting up llama.cpp for GPU inference.
While llama.cpp uses ggml for tensor math, vLLM uses PyTorch. Although the Deep Learning AMI nominally supports PyTorch it makes sense to confirm.
import torch
torch.cuda.is_available()Truetorch.cuda.get_device_name(0)'Tesla T4'Nice.
Create and activate a virtual environment. Then use pip3 to install.
pip3 install vllmConfirm that it’s installed and on your PATH (within the current virtual environment).
vllm --version0.25.1Serving Models
Now that all of the infrastructure is in place, it’s time to serve the models. The CPU and GPU sections below use different models on different hardware, but the API exposed by the server is the same.
Serving Models on a CPU
I’ll use llama.cpp for inference using the CPU on a machine with 16 CPUs, 18 MiB of L3 cache and 32 GiB RAM. llama.cpp provides both a CLI client and a server. The client, llama-cli, creates a chat interface to a model without running a server.
llama-cli -hf Qwen/Qwen3-4B-GGUFThe -hf argument points the CLI at the Hugging Face model downloaded earlier. If the specified model hasn’t already been downloaded then the CLI will fetch it and plop it into the model cache. There are other parameters, -m or --model and -mu or --model-url which point to an arbitrary model on disk or at a URL respectively.
As I noted earlier, I have downloaded this model at various quantisations. Since I have not specified one explicitly, the CLI will use the default quantisation. But you can also specify a quantisation explicitly by appending it to the model ID.
llama-cli -hf Qwen/Qwen3-4B-GGUF:Q5_K_M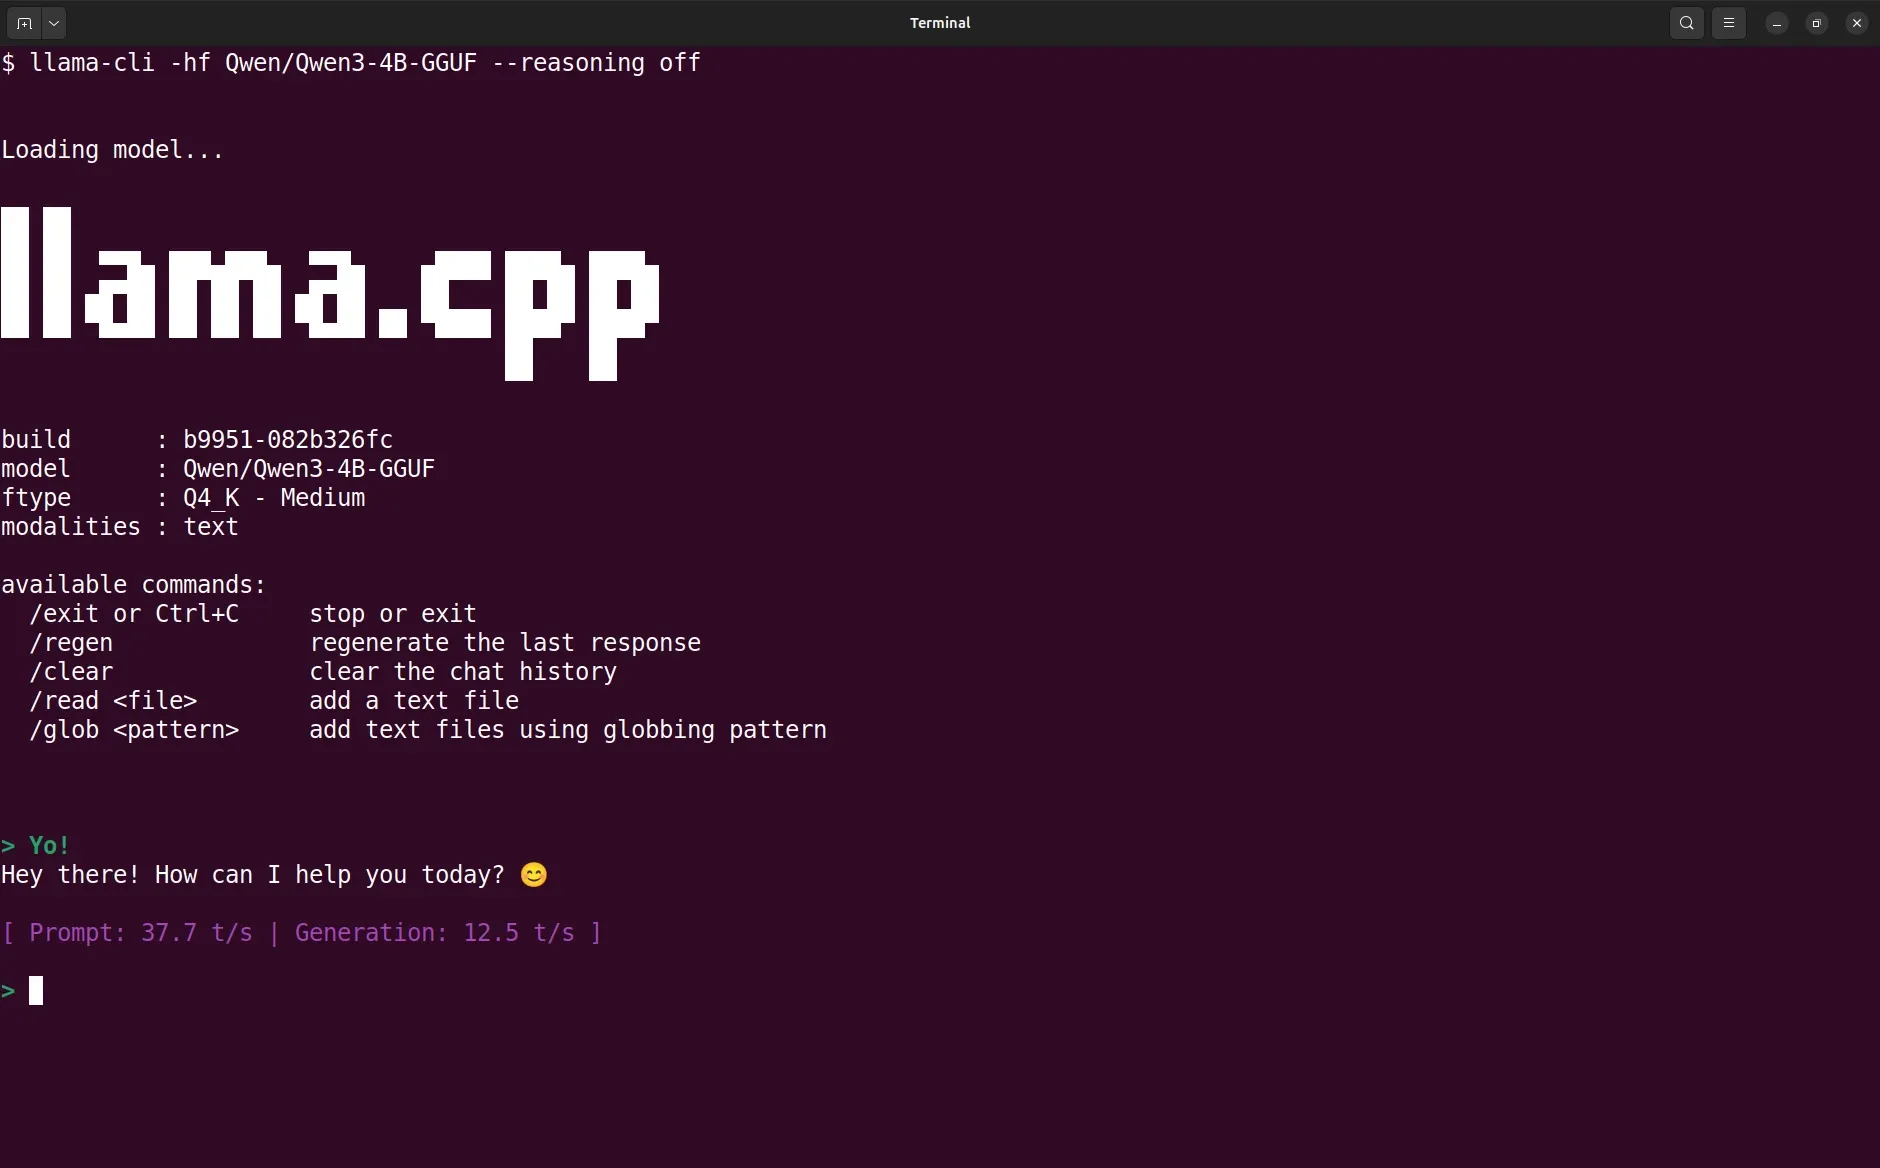
I found the Qwen/Qwen3-4B-GGUF model to be remarkably competent. Chat away!
As opposed to the CLI, llama-server runs a server that exposes an API. To serve the same model:
# 📢 Serving Qwen3-4B on a CPU with llama.cpp.
llama-server -hf Qwen/Qwen3-4B-GGUF \
  --alias qwen3-4b \
  --host 127.0.0.1 \
  --port 8080 \
  -c 4096
What do the various arguments mean?
--alias— A model ID. Defaults to the GGUF filename.--host— The IP address the server will bind to. Change to0.0.0.0to allow external access, but beware: the server has no authentication!--port— The port to listen on. The default is8080.-cor--ctx-size— The size of the context KV cache (see note below) in tokens. The default is4096. The KV cache is pre-allocated, so a larger value increases memory use regardless of the actual conversation length.
Interaction with the model API happens via HTTP requests. Sending a request to the /health endpoint confirms that the server is running.
curl -s http://127.0.0.1:8080/health | jq{
"status": "ok"
}The server is running and ready to accept requests. As smoke tests go though, that’s pretty lame. A more useful test is to ask the server to generate a completion.
curl -s http://127.0.0.1:8080/completion \
  -d '{"prompt": "The cat", "n_predict": 5, "temperature": 0.4, "seed": 123}' \
| jq .content
" is on the mat."The server is working, and the model generates text. 🚀
A satisfying but boring result. If you suspect that it’s contrived, then you’re correct. I fiddled around with the n_predict and seed values until I got a short, complete output: “The cat” is completed to “The cat is on the mat.” This is not the way that we have become accustomed to interacting with an LLM. It’s raw text continuation, not part of a conversation. Two tokens go in and the model just predicts the next 5 tokens that plausibly follow those two words. No chat template. No concept of roles.
The /health and /completion endpoints are served by the llama.cpp HTTP server and are not part of the OpenAI API. Further information can be found in the HTTP server documentation.
Now send a request directly to an OpenAI-compatible API endpoint.
curl http://127.0.0.1:8080/v1/chat/completions \
  -H "Content-Type: application/json" \
  -d '{
    "messages": [
      {"role": "user", "content": "Explain why the sky is blue in two sentences."}
    ],
    "model": "qwen3-4b",
    "temperature": 0
  }'
The body of the request is a JSON object with the following fields:
messages— A list of messages in the conversation. Each message is a JSON object with arole(system,user, orassistant) andcontent.model— The model to use. Can be either a model alias or a full model ID.temperature— The sampling temperature to use for the completion. Lower values give more deterministic output.
The completions endpoint exposes a variety of other more niche fields for controlling the conversation, such as:
max_tokens— The maximum number of tokens to generate in the completion. Beware that this can cause truncated content in the response! The response has afinish_reasonfield that indicates whether the model stopped because it reached the end of the text ("stop") or because it hit themax_tokenslimit ("length").top_p— An alternative totemperaturefor controlling randomness.seed— Controls the random number generator used for sampling tokens. Same seed and prompt should give the same output.
I’ve used the model alias that I specified when starting the server. I could equally have used the full model ID.
{
  "choices": [
    {
      "finish_reason": "stop",
      "index": 0,
      "message": {
        "role": "assistant",
        "content": "The sky appears blue because shorter wavelengths of light, like
          blue, are scattered more by the atmosphere due to Rayleigh scattering.
          This scattered blue light is what we perceive when we look up at the
          sky.",
        "reasoning_content": "Okay, the user wants an explanation of why the sky is
          blue in two sentences. Let me start by recalling the basic concept. The
          sky appears blue due to Rayleigh scattering. When sunlight enters the
          Earth's atmosphere, shorter wavelengths (blue light) are scattered more
          by the molecules in the air. This scattered blue light is what we see
          when we look up at the sky.

          Wait, but I need to make sure I'm not missing any key points. Rayleigh
          scattering is the main phenomenon here. Also, the fact that blue light
          is scattered in all directions, making it more visible than other colors.
          But I should check if there's anything else. Maybe mention that the sun's
          spectrum has more blue light, so even though all colors are scattered,
          blue is more prominent. Also, when the sun is low, the sky appears more
          red because the blue light is scattered out of our line of sight. But
          the user didn't ask about that, so maybe stick to the main point.

          So, first sentence: Rayleigh scattering causes shorter wavelengths like
          blue to scatter more in the atmosphere. Second sentence: This scattered
          blue light is what makes the sky appear blue during the day. That's
          concise and covers the main points. Let me check if that's accurate. Yes,
          that's correct. I think that's the standard explanation. Make sure it's
          two sentences and clear."
      }
    }
  ],
  "created": 1784346856,
  "model": "qwen3-4b",
  "system_fingerprint": "b9951-082b326fc",
  "object": "chat.completion",
  "usage": {
    "completion_tokens": 324,
    "prompt_tokens": 19,
    "total_tokens": 343,
    "prompt_tokens_details": {
      "cached_tokens": 18
    }
  },
  "id": "chatcmpl-U3hjroo6efu6JaqsNOltGMLnhFEFyE8m",
  "timings": {
    "cache_n": 18,
    "prompt_n": 1,
    "prompt_ms": 81.544,
    "prompt_per_token_ms": 81.544,
    "prompt_per_second": 12.263317963308154,
    "predicted_n": 324,
    "predicted_ms": 31121.671,
    "predicted_per_token_ms": 96.05454012345679,
    "predicted_per_second": 10.410752044772918
  }
}
A solid answer. And the reasoning looks eminently reasonable. Although it’d please me if the model had the courtesy to capitalise “Sun”. There’s a lot of useful metadata in the usage and timings fields. 📌 I reformatted the JSON to make the content easier to read.
Serving Models on a GPU
My original intention was to use vLLM to run models on GPU but since I have llama.cpp all set up it makes sense to try it too. We can use the same model, Qwen/Qwen3-4B-GGUF, for both CPU and GPU inference.
As before I’ll start by launching a chat client.
llama-cli -hf Qwen/Qwen3-4B-GGUFSince no quantisation was specified it’ll be chosen automatically. If you don’t want to leave this to chance then you can choose a particular quantisation when launching the client. And this is only an issue since I downloaded multiple quantisations.
llama-cli -hf Qwen/Qwen3-4B-GGUF:Q8_0In both cases the client was responsive.
Let’s hurry on to the server. I’ll use the Q8_0 quantisation with a context size of 4 K tokens. It might be necessary to revert to a lower quantisation, like Q6_K, if you want more context space. I didn’t experiment with this tradeoff.
# 📢 Serving Qwen3-4B on a GPU with llama.cpp.
llama-server -hf Qwen/Qwen3-4B-GGUF:Q8_0 \
  --alias qwen3-4b \
  --host 127.0.0.1 \
  --port 8080 \
  -c 4096 \
  -ngl 99
There’s a new argument that I had not encountered previously:
-nglor--n-gpu-layers— This specifies how many model layers should be “offloaded” to the GPU. Provided that the specified number is greater than the actual number of layers in the model (36 layers forQwen/Qwen3-4B-GGUF), all of the layers’ weights will be copied across to the GPU’s VRAM. It’s possible to offload only some layers onto the GPU (“partial offloading”), in which case inference proceeds via both GPU and CPU compute. If you set this to zero then inference will happen on the CPU regardless of whether or not there’s a GPU present.
The server becomes available very quickly and we can start sending requests.
curl http://127.0.0.1:8080/v1/chat/completions \
  -H "Content-Type: application/json" \
  -d '{
    "messages": [
      {
        "role": "user",
        "content": "What is the 47th digit of pi? If you do not know, say so."
      }
    ],
    "model": "qwen3-4b",
    "temperature": 0
  }'
The prompt was chosen to assess calibration and self-consistency. The result did not disappoint.
{
  "choices": [
    {
      "finish_reason": "stop",
      "index": 0,
      "message": {
        "role": "assistant",
        "content": "The 47th digit of π (pi) is **7**. By systematically counting
          each digit from position 1 onward, the 47th digit is confirmed to be
          **7**. **Answer:** 7"
      }
    }
  ],
  "created": 1784695767,
  "model": "qwen3-4b",
  "system_fingerprint": "b10060-635cdd5fc",
  "object": "chat.completion",
  "usage": {
    "completion_tokens": 2313,
    "prompt_tokens": 31,
    "total_tokens": 2344,
    "prompt_tokens_details": {
      "cached_tokens": 30
    }
  },
  "id": "chatcmpl-68yZNud6qL30KJt7EWdUo0kSr0dtsCyt",
  "timings": {
    "cache_n": 30,
    "prompt_n": 1,
    "prompt_ms": 22.851,
    "prompt_per_token_ms": 22.851,
    "prompt_per_second": 43.761760973261566,
    "predicted_n": 2313,
    "predicted_ms": 50132.478,
    "predicted_per_token_ms": 21.67422308690013,
    "predicted_per_second": 46.13775524920192
  }
}
In the interests of brevity I excised the reasoning_content field and trimmed down the content value. I’ll summarise reasoning though. It considered three approaches:
- Look up the digits of π online — Considered useful for verification, but abandoned because internet access was unavailable.
- Calculate π using a formula or algorithm — Methods such as the Leibniz formula were considered, but rejected as unnecessarily complicated and potentially slow.
- Recall and count the known digits of π — The approach ultimately used.
The selected strategy seems a good choice: if you already know the digits of π then there’s no reason to get them again. Who knows how many of those digits are packed into the model? 🤯 The digits after the decimal point were written out and counted individually. Then they were regrouped into blocks of ten as a check. Counting was repeated a few times to eliminate indexing errors. That felt borderline obsessive, but it’s good to know that the model was being diligent. And the answer is correct according to independent validation, so all that diligence paid off.
I’m quite satisfied that llama.cpp works well on GPU. What about vLLM?
# 📢 Serving Qwen3-4B on a GPU with vLLM.
vllm serve Qwen/Qwen3-4B \
  --served-model-name qwen3-4b \
  --dtype float16 \
  --max-model-len 8192
It takes a short while to load the model and start the server. Wait until you see “Application startup complete.” These are some other useful command line options:
--served-model-name— Gives the model a name that will be exposed to clients. Analogous to--aliasfor llama.cpp.--dtype— Sets the numerical precision used for weights and activations. Common values areauto(the default),float16orfp16(16-bit floating point),bfloat16orbf16(also 16-bit floating point but with different split between coefficient and mantissa; more exponent range, less precision) andfloat32orfp32(32-bit floating point; not often used for inference). The numerical precision affects both the memory footprint and speed of the model, with lower precision reducing memory consumption and elevating speed at the expense of quality and accuracy.--max-model-len— The maximum context length (combined number of tokens in prompt and response). Used to set a context length less than the one baked into the model. Analogous to--ctx-sizefor llama.cpp.
Other useful options:
--host— The IP address the server will bind to.--port— The port the server will listen on. The default is8000.
Once the server is running you can fire up a chat client via vllm chat.
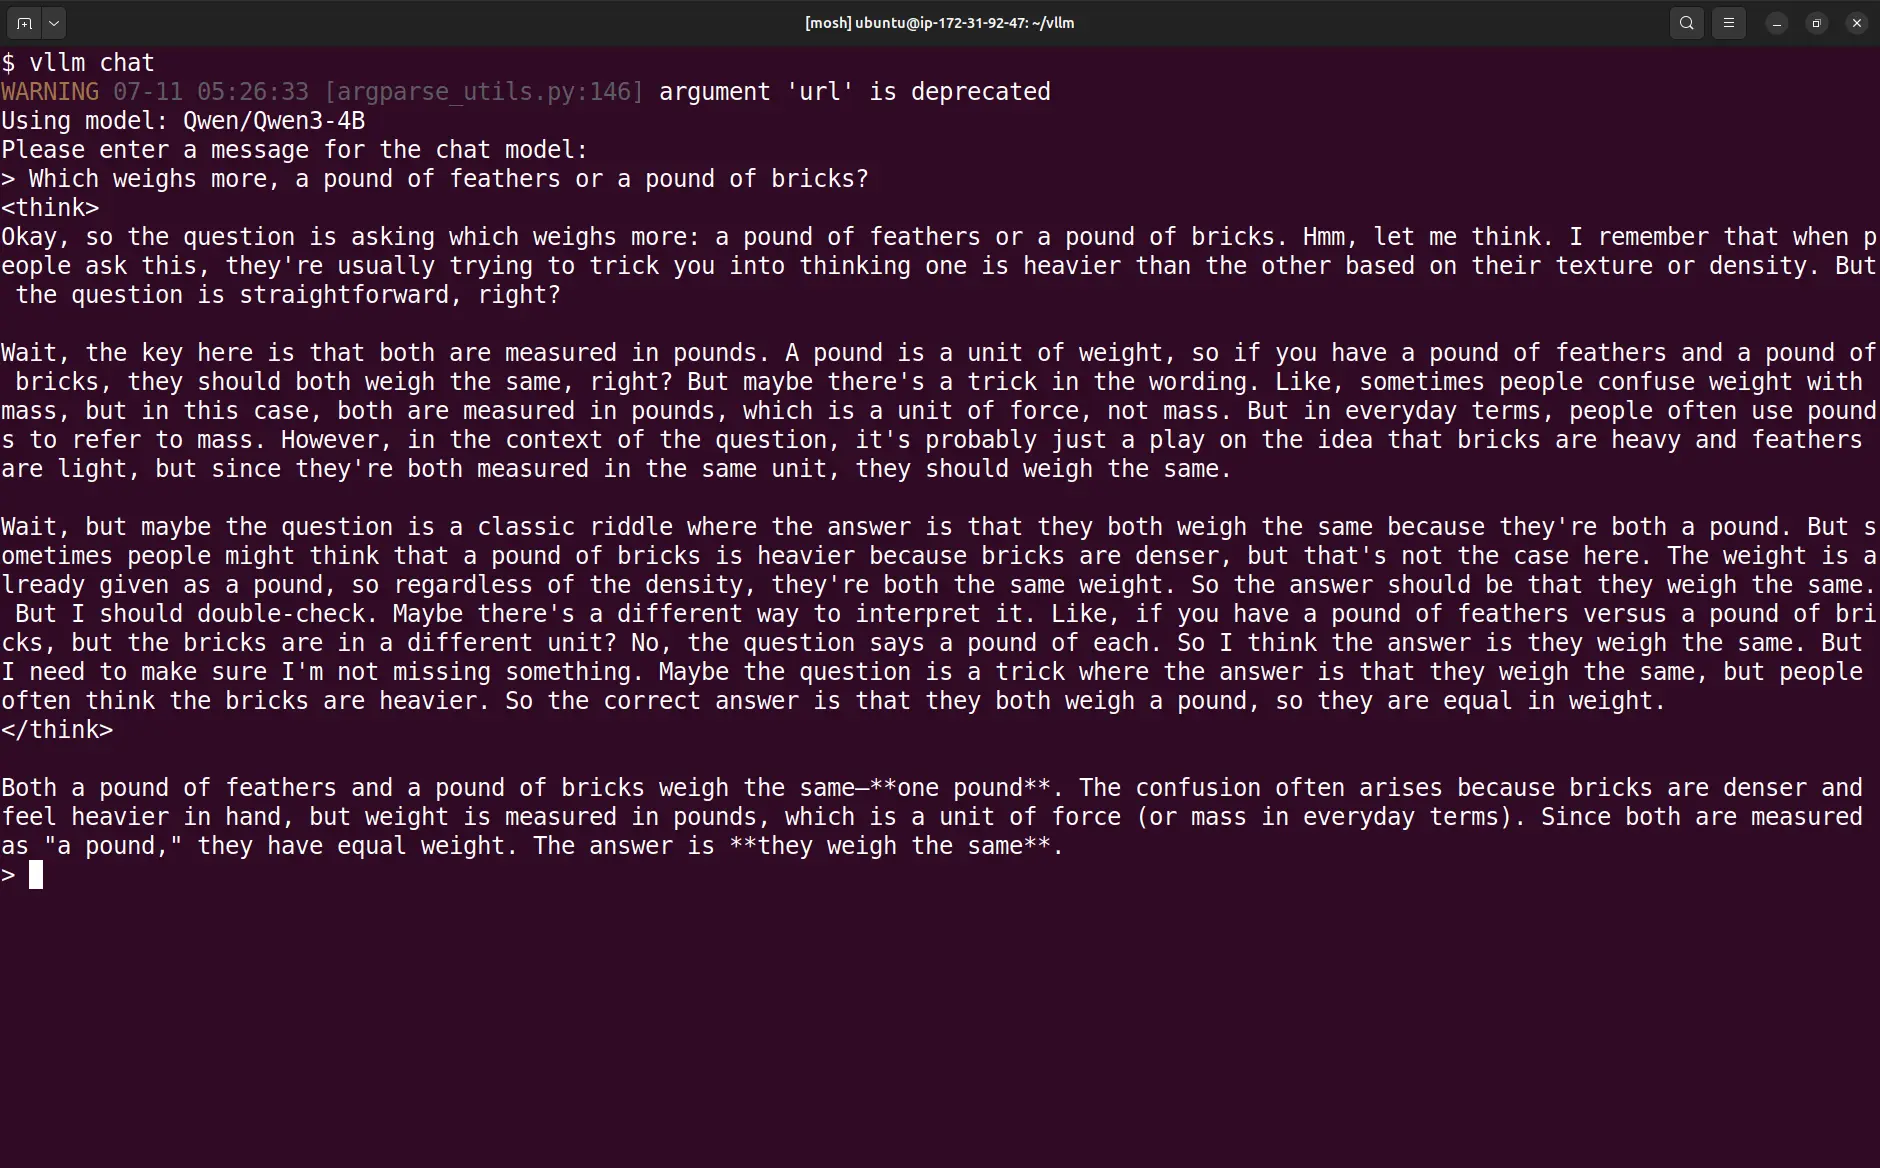
Or you can interact with it programmatically through the OpenAI-compatible API. We’ll use essentially the same request as before, but this time throw in an argument to suppress reasoning output and change the port to reflect the default port used by vLLM.
curl http://127.0.0.1:8000/v1/chat/completions \
  -H "Content-Type: application/json" \
  -d '{
    "messages": [
      {
        "role": "user",
        "content": "What is the 47th digit of pi? If you do not know, say so."
      }
    ],
    "model": "qwen3-4b",
    "temperature": 0,
    "chat_template_kwargs": {"enable_thinking": false}
  }'
{
"id": "chatcmpl-a7bef29419611340",
"object": "chat.completion",
"created": 1784719320,
"model": "qwen3-4b",
"choices": [
{
"index": 0,
"message": {
"role": "assistant",
"content": "To find the **47th digit of π (pi)**, we need to look at the
sequence of digits in the decimal expansion of π.
Here is the decimal expansion of π (the first few digits):
**3.1415926535 8979323846 2643383279 5028841971 6939937510 5820974944
5923078164 0628620899 8628034825 3421170679...**
Let's count the digits after the decimal point:
1: 1
2: 4
3: 1
…
46: 3
47: **7**
So, the **47th digit of π** is **7**.",
"reasoning": null
},
"finish_reason": "stop"
}
],
"system_fingerprint": "vllm-0.25.1-40ed4a91",
"usage": {
"prompt_tokens": 32,
"total_tokens": 489,
"completion_tokens": 457
}
}There were a lot more metadata fields. I trimmed out the null ones. The vLLM response doesn’t include the timing data that’s present in the llama.cpp response. But otherwise it looks good!
Complexity Buys Control
Working with Hugging Face is complicated. But the extra slog is worth it if you want granular control over model files, quantisation, runtime and hardware. Otherwise Ollama is probably still the answer.
My suggested route to working with Hugging Face models:
- Use the CLI (
hf) to download models. Be specific or you’ll waste bytes on variants you don’t want. - Use llama.cpp for quick local testing on a CPU (although also capable on GPU).
- Use vLLM to run models on a GPU.
- Adjust the quantisation/precision and context size until you have something that’s responsive.
Have fun, certainly. But maybe don’t download 15 GiB of unnecessary quantisations in the name of scientific curiosity.