EC2 Spot Instances can provide very affordable computing on EC2 by allowing access to unused capacity at significant discounts.
Allocation of spot instances is managed by a bidding system. You stipulate the maximum spot price that you are willing to pay and an instance will be launched when the spot price is less than your maximum. The instance will run until you stop it or the spot price exceeds your maximum.
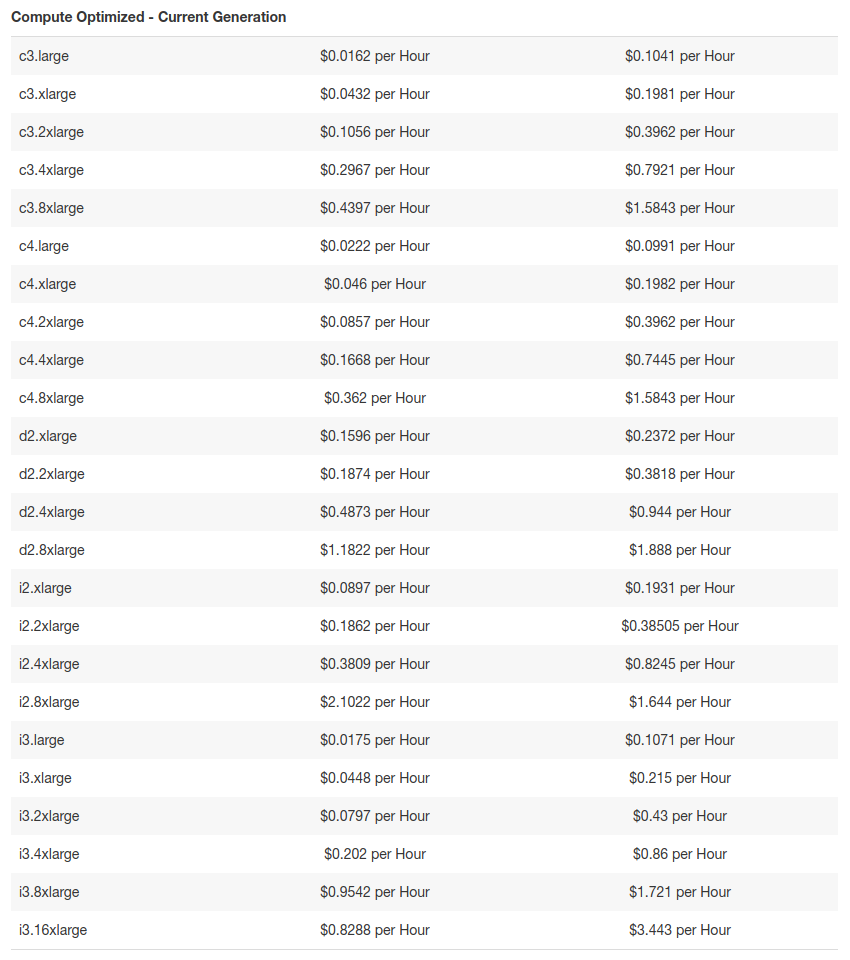
The current spot prices for various instances can be found here. An extract from that page is given below. The two columns of prices reflect the Linux/UNIX (left) and Windows (right) usage. It’s readily apparent that the prices are very competitive relative to prices for on-demand instances. For example, at the same time a c3.large Linux on-demand instances cost $0.105 per hour, more than six times as much as the equivalent spot instance.
You can make an informed decision relating to bid price by using the Spot Bid Advisor. As a starting point you’d probably want to choose a bid price that would result in a low probability of being outbid.

A source of concern can be the level of variability of spot pricing. Fortunately you can access Pricing History from the Spot Requests console. Here’s an example.
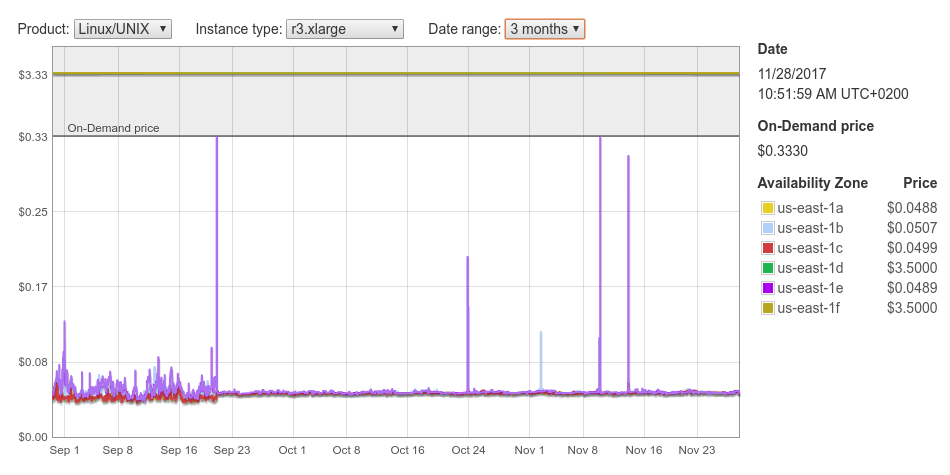
The spot price does spike up to the on-demand price from time to time, but it’s only for short periods. Generally it’s consistently low. It’s also worthwhile toggling the availability zones. If you toggle off us-east-1e then you find that none of the other zones came anywhere near the on-demand price.
This sounds pretty good. How does one get started?
Requesting a Spot Instance
On the EC2 Dashboard click on the Spot Requests menu item. You’ll see a list of your current requests (possibly empty). Press the Request Spot Instances button.
You’ll be taken to the Spot Instance Launch Wizard.
Step 1
Fill out at least the following:
- Target capacity: how many instances you require;
- AMI: the Amazon Machine Image (choice of operating system) and
- Instance type: the specifications of the instance.
I chose the “Canonical, Ubuntu” AMI but any of the other Linux images would work too.
Press the Next button.

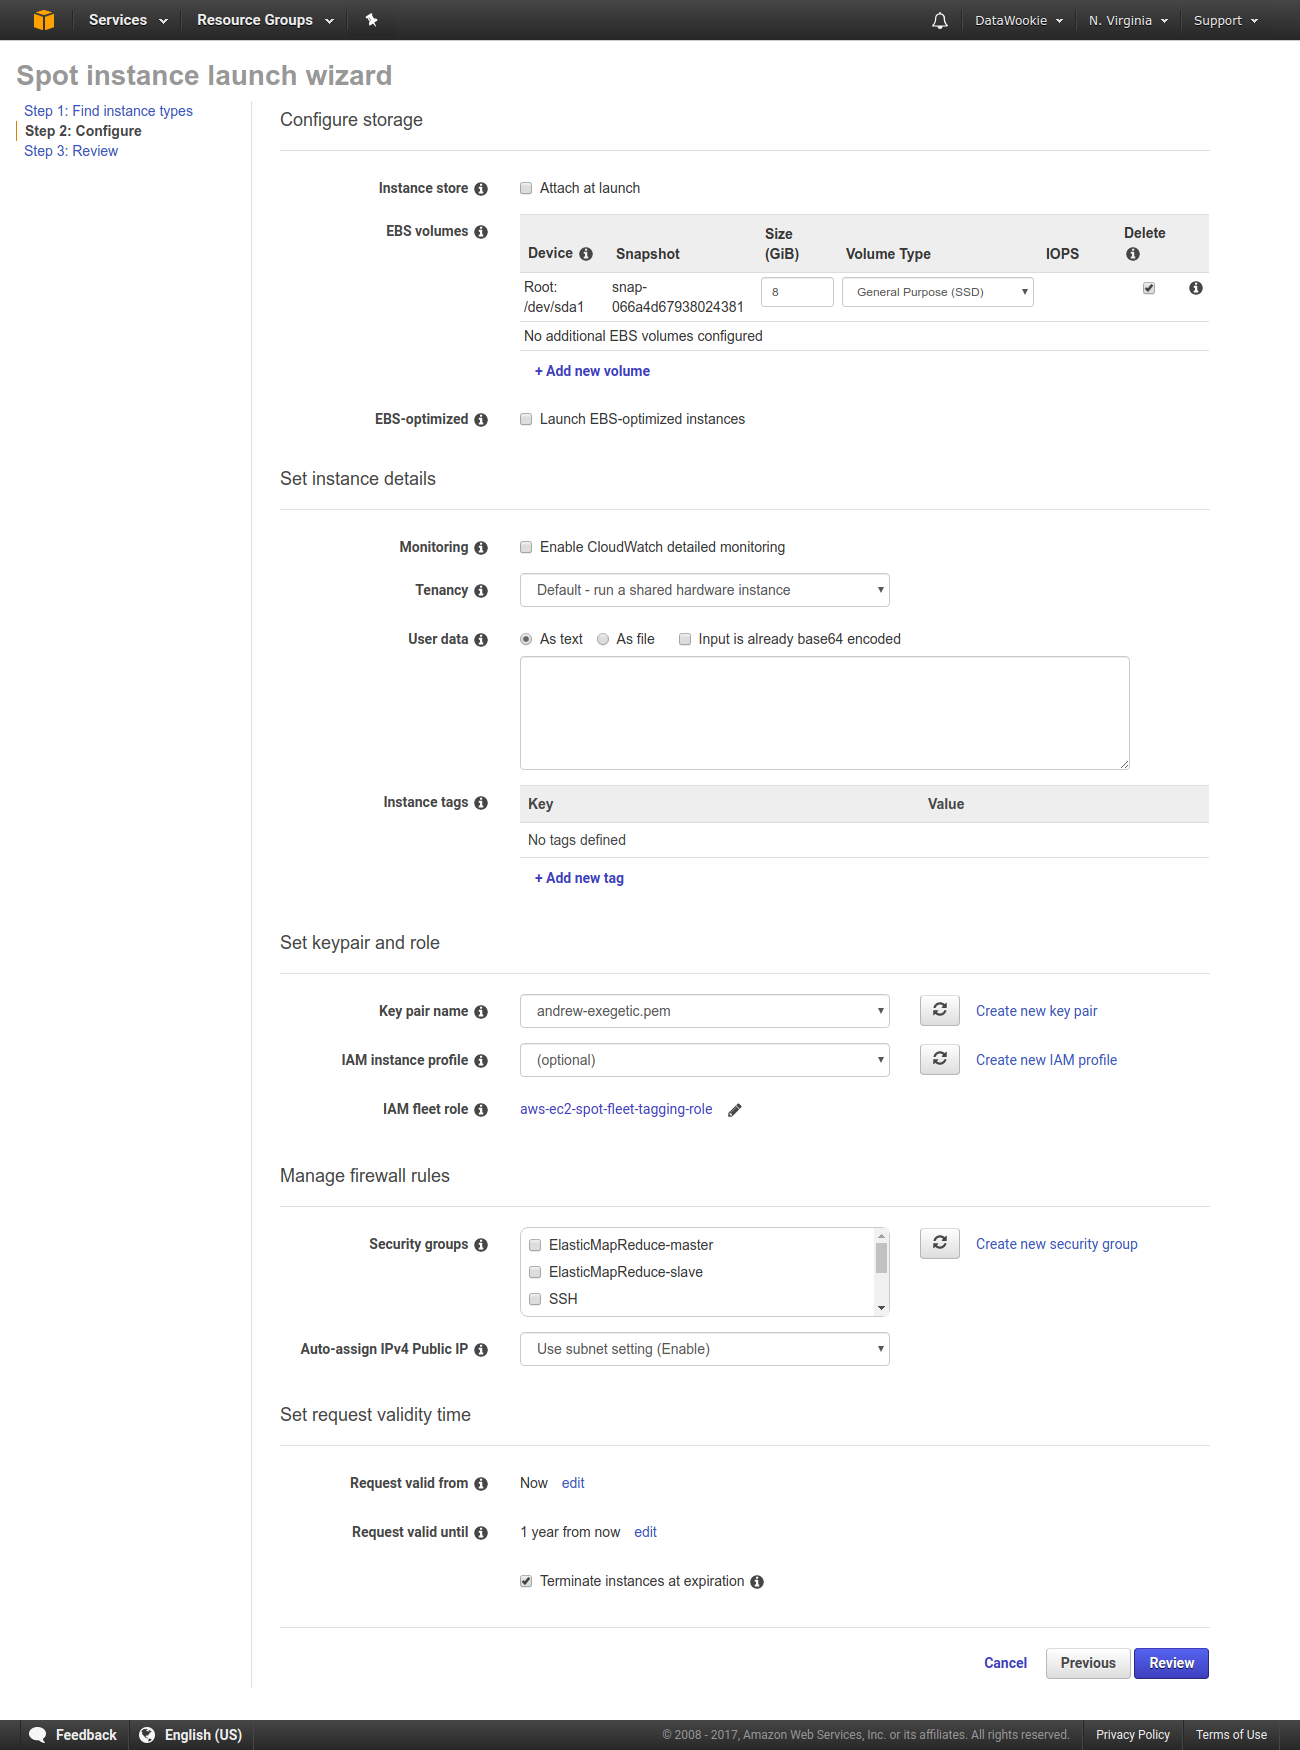
Step 2
The only essential item in Step 2 is to select a key pair. If you don’t already have one, created a new key pair. Keep the resulting PEM file somewhere safe!
Another thing worth considering in this step is adding tags. This might be helpful, for instance, for keeping tracks of instances associated with different jobs or clients.
Press the Review button.
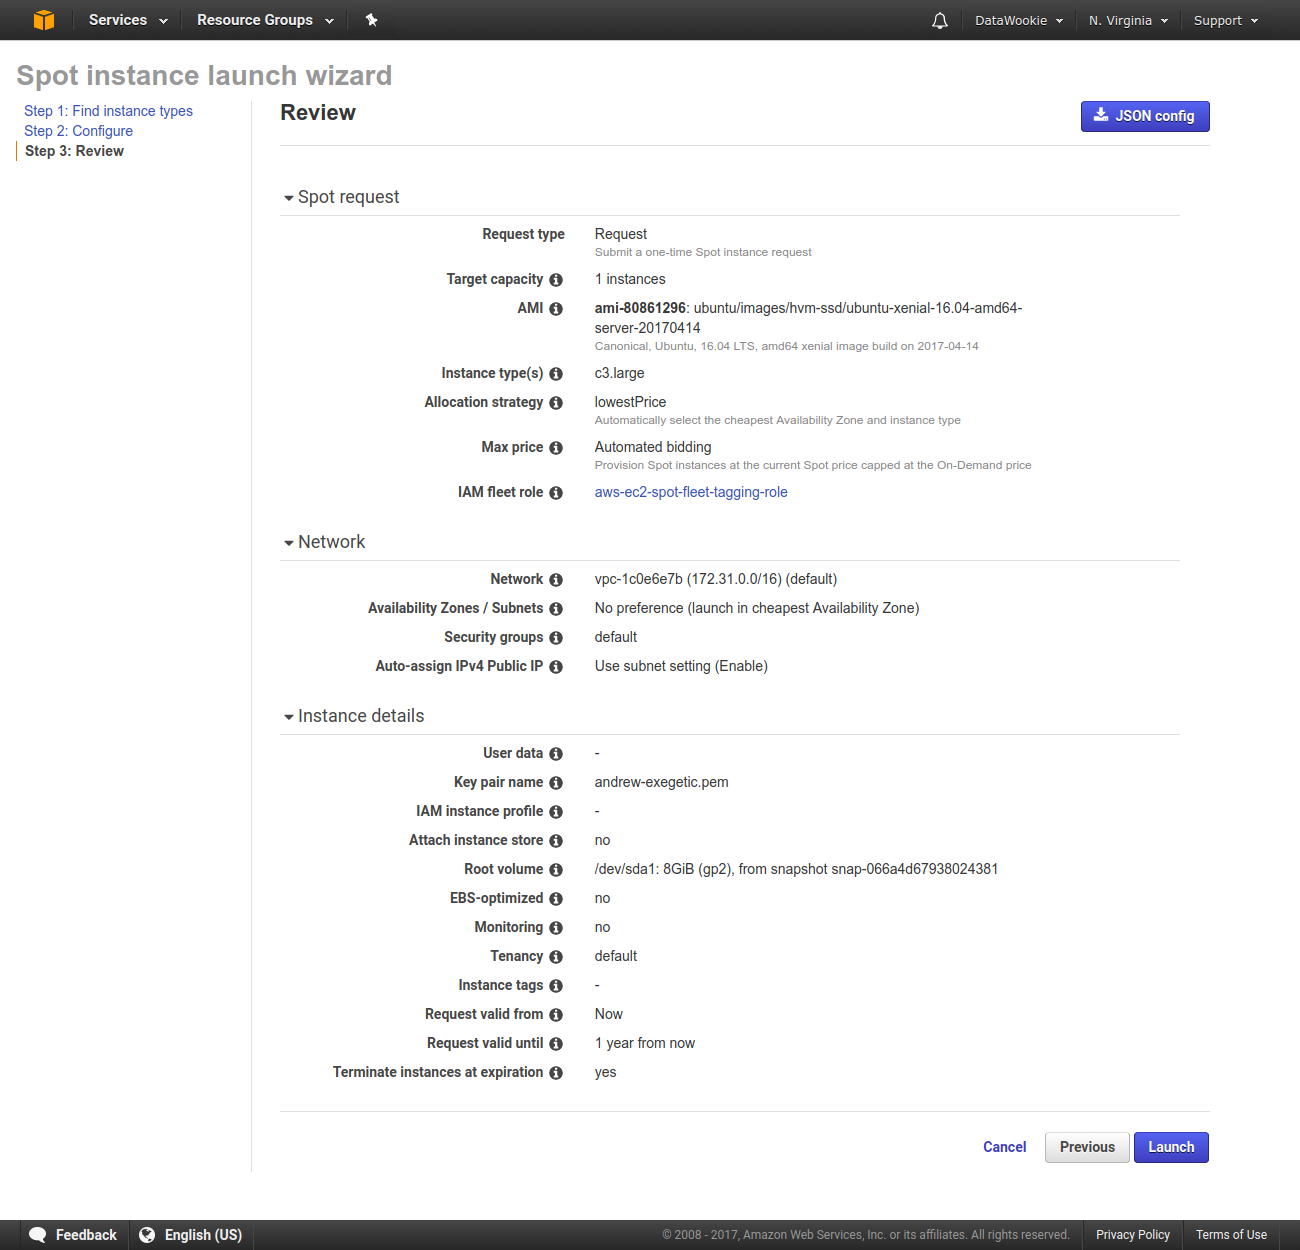
Step 3
In Step 3 you are presented with a summary of your request. If everything is in order then press the Launch button.
Monitoring Launch
You can monitor the state of your request by going back to the Spot Requests page. When the State becomes ● active it indicates that your instance has been launched.
You can see the result on the Instances page, where you’ll find the Public DNS entry which will allow you to make a connection.
Persisting Data
Since the spot price changes, it’s possible that your instance might be unexpectedly terminated. It’d be a shame if all your data were lost.
To ensure that your data are persisted in the event of your instance being terminated add a volume, mount it on your instance and use it to store the data. Even if the instance is lost the extra volume will still be there (with all your precious data on it!).