With a local or remote SSH tunnel the ports on both the local and remote machines must be specified at the time of creating the tunnel. But what if you need something more flexible? That’s where Dynamic Port Forwarding comes into play.
Local and remote SSH tunnels serve the same fundamental purpose: they make it possible to securely send data across an unsecured network. The implementation details are subtly different though. A local SSH tunnel acts like a secure bridge from a local machine to a remote server. It’s ideal for accessing services on the remote server which aren’t publicly exposed. Conversely, a remote SSH tunnel reverses this direction, forwarding traffic from the remote server back to a local machine (or another machine).
The critical distinction between the two is the direction of the connection between the remote and local machines.
In the previous post we looked at how to set up a collection of static redirects via the vercel.json configuration file. Now we’re going to explore a more flexible and dynamic alternative using Edge Middleware.
I’m not a gamer, but I have an offspring who is deeply obsessed with Minecraft. I set up a Minecraft server for her so that she can play with her friends online in a safe environment.
SSH tunnels are a powerful and secure method for transmitting data over potentially unsecured networks. They allow users to establish an encrypted connection between their local machine and a remote server, providing a secure and private pathway for data. An SSH tunnel will allow a service running on a remote machine to appear as if it is running on a local machine. This is also known as port forwarding.
A redirect is a rule which sends users to a different URL than the one they requested. They are most commonly used to ensure that browsers still get to the correct page after it has been moved to a new URL.
If you have a relatively small number of redirects and don’t need to do anything too fancy then static (or “configuration”) redirects are a good option. Static redirects are configured on Vercel by adding entries to the vercel.json configuration file. There’s just one major snag: you can only create 1024 redirects using this mechanism.
Sometimes when you run git merge you will be confronted with a huge load of merge conflicts. However, if you are lucky there might be a clear rule which you can apply to each of those conflicts, either
accept current change (change on current branch or ours) or
accept incoming change (incoming change from other branch or theirs).
In this case you can save yourself a lot of time and effort by specifying a particular merge strategy option.
By default Gatsby will embed CSS into the <head> of each HTML page. This is not ideal. In this post I take a look at how to move that CSS into an external file and how the contents of that file can be optimised to remove unused CSS.
Suppose that you want to make your site routing a little more flexible. For example, rather than just going straight to a 404 page if the path is not found, you might want to try and guess an appropriate (and valid!) path. This is where dynamic routing comes into play.
Setting up a custom 404 page can add something special to your site. It provides you with the opportunity to do something memorable in the unfortunate event that a user asks for an unknown page.
Deploying a Gatsby site can feel like a daunting task, especially with the array of potential hosting platforms. Among them, Netlify is a strong contender due to its seamless integration and deployment process. Netlify is actively engaged in improving support for Gatsby on their platform. This post will show how to get your Gatsby site live on Netlify.
One of my standard approaches to scraping content from a dynamic website is to diagnose the API behind the site and then use it to retrieve data directly. This means that I can make efficient HTTP requests using the requests package and I don’t need to worry about all of the complexity around scraping with Selenium. However, it’s often the case that the API requests require a collection of cookies and headers, and those need to be gathered using Selenium.
There are a couple files which can have an impact on the SEO performance of a site: (1) a sitemap and (2) a robots.txt. In a previous post we set up a sitemap which includes only the canonical pages on the site. In this post we’ll add a robots.txt.
A Gatsby site will not have a robots.txt file by default. There’s a handy package which makes it simple though. We’ll take a look at how to add it to the site and a couple of ways to configure it too.
The principal purpose of a sitemap file is to inform search engines about the pages on a website that are available for crawling. It provides a list of URLs along with additional metadata about each URL to help search engines more intelligently crawl the site. If there are multiple page versions on a site then the sitemap should include only the canonical versions of those pages.
In the previous post we completed the implementation of multiple site versions. There’s now more than one version of each of the content pages. From a developer and user perspective this is ideal: we have granular documentation for each version of our fictitious site. However, for SEO purposes this is not ideal.
We’re now going to bring together what we have been building in the previous two blog posts. First we added the raw AsciiDoc source into the GraphQL schema. Next we used AsciiDoc preprocessor directives to include conditional content into the rendered content pages. Specifically, we conditionally included content on pages depending on the value of a version attribute which was dynamically inserted into the raw AsciiDoc front matter. Now we are going to set up a URL structure which includes a version number and list the available documentation versions from the landing page.
Suppose that you have a product which is undergoing rapid development. Each new release of the product is assigned a unique version number. The product documentation is diligently updated in line with the evolving product. Ideally the documentation should be consistent with the latest release of the product. However, not all of your users will be using the latest version, so they should also be able to access older versions of the documentation.
It’s useful to be able to add fields to the GraphQL schema. In this post I’ll illustrate how to do this by adding nodes for the raw AsciiDoc source and linking the raw data to the processed content.
It’s often the case that we want pages on a site to be presented in a specific order. It’s possible to do this systematically by sorting on some existing aspect of the content (for example, sort alphabetically by page title) or by introducing a page attribute that’s specifically intended for sorting.
It can be useful to embed additional metadata into content pages on a Gatsby site. In this post we’ll take a look at how to add fields to the header of AsciiDoc files. These fields will be accessible via GraphQL.
Redirects instruct web browsers to automatically reroute from one URL to another. They are especially vital when website structures change, pages get deleted, or content moves to a new location. Whether you’re rebranding, restructuring, or simply optimizing your site’s user experience, Gatsby offers powerful tools for handling redirects seamlessly. In this post, we’ll delve into the intricacies of implementing and managing redirects with Gatsby, ensuring your visitors always land in the right place.
A sitemap serves as a navigational blueprint for search engines, ensuring they can efficiently crawl and index all essential pages of a website. By providing a structured list of URLs, a sitemap streamlines the discoverability of content, especially in complex or extensive sites. This not only optimizes search engine ranking and visibility but also ensures that any updates or new content additions are promptly recognized and indexed, thereby enhancing the site’s overall accessibility and user experience.
AsciiDoc is a powerful format for authoring content. Like Markdown it’s simple to use, but offers more features and flexibility. In this post I’ll look at how to adapt a Gatsby site to use AsciiDoc.
By default the code behind a Gatsby site is written in JavaScript. However, as a site scales it can become more difficult to maintain all of that JavaScript. One way to improve the scalability of the site is to migrate from JavaScript to TyepScript.
Gatsby is a modern, fast framework for building optimized, high-performance websites. It’s a static site generator that compiles a site into static files at build time. Under the hood it uses React (user interface library) and GraphQL (data query language).
Compared with tools like WordPress or Joomla, Gatsby feels a lot more technical and less user-friendly. The learning curve is steeper and it takes longer to get things set up. However, the reward is more flexibility and granular control over all aspects of the site.
This post runs through the steps for setting up a minimal Gatsby site.
Many sports trading strategies hinge on odds changing over time. For instance, a strategy might involve laying a market at lower odds, anticipating the opportunity to back it at higher odds later on. Conversely, one might back a market at higher odds, hoping to lay it at lower odds in the future. Some strategies work with short term odds fluctuations, while others depend on longer term odds variations.
In this post I’ll take a look at some examples of odds dynamics and unpack why the odds change.
In a previous post I wrote about an Undetected ChromeDriver Docker image. A container derived from that image exposed a view of the Chrome session via VNC on port 5900. This worked really well. However, it meant having yet another app (the VNC client) running on my already cluttered desktop. I have extended the Docker image to use noVNC which means that I can now view the Chrome session via a web browser. This is very convenient since I always have a browser running.
One day your Gatsby site is building fine and the next it’s breaking with a JavaScript heap out of memory error. What’s gone wrong and how can you fix it?
At present there are two viable formats for the Transparency in Coverage data: JSON and XML. In this post we’ll dig into what the JSON files look like.
I have a challenge: extracting data from an enormous JSON file. The structure of the file is not ideal: it’s a mapping at the top level, which means that for most standard approaches the entire document needs to be loaded before it can be processed. It would have been so much easier if the top level structure was an array. But, alas. It’s almost as if the purveyors of the data have made it intentionally inaccessible.
The Transparency in Coverage Act (bill currently before congress) is a set of regulations that aim to increase transparency in health insurance coverage in the USA. The primary goal of the act is to provide consumers with clear, accessible, and actionable information about the cover that they receive from their health insurance. What services are included? How much will the insurer pay for a specific service? And how does this change from one provider to another? Or from one geographic region to another? Answers to these kinds of questions were previously hard, if not impossible, for a consumer to access.
In principle the information covered by the regulations should include costs, benefits, and other essential details. It should ensure that consumers can make informed healthcare decisions and understand the financial implications of their choices.
Alembic can autogenerate migrations. This is probably its most valuable feature. However, I had a situation where --autogenerate kept on creating migrations for the databasechangelog and databasechangeloglock tables. These are Liquibase tables and should never feature in the Alembic migrations.
The solution was to tell Alembic to ignore these tables by updating the env.py module.
Marshmallow can readily handle nested schemas. But sometimes it’s preferable to flatten that schema for loading and/or dumping the data. The fields.Pluck() class makes this possible.
In a previous post I documented the process of setting up a GitLab Runner using the gitlab/gitlab-runner Docker image. As of GitLab Runner v16.0.0 the registration process has changed somewhat. This is an update to reflect that change.
Many of my projects now involve building a Docker image. The image is generally pushed to a registry as part of a CI workflow. This is how I push an image to Docker Hub from GitLab CI.
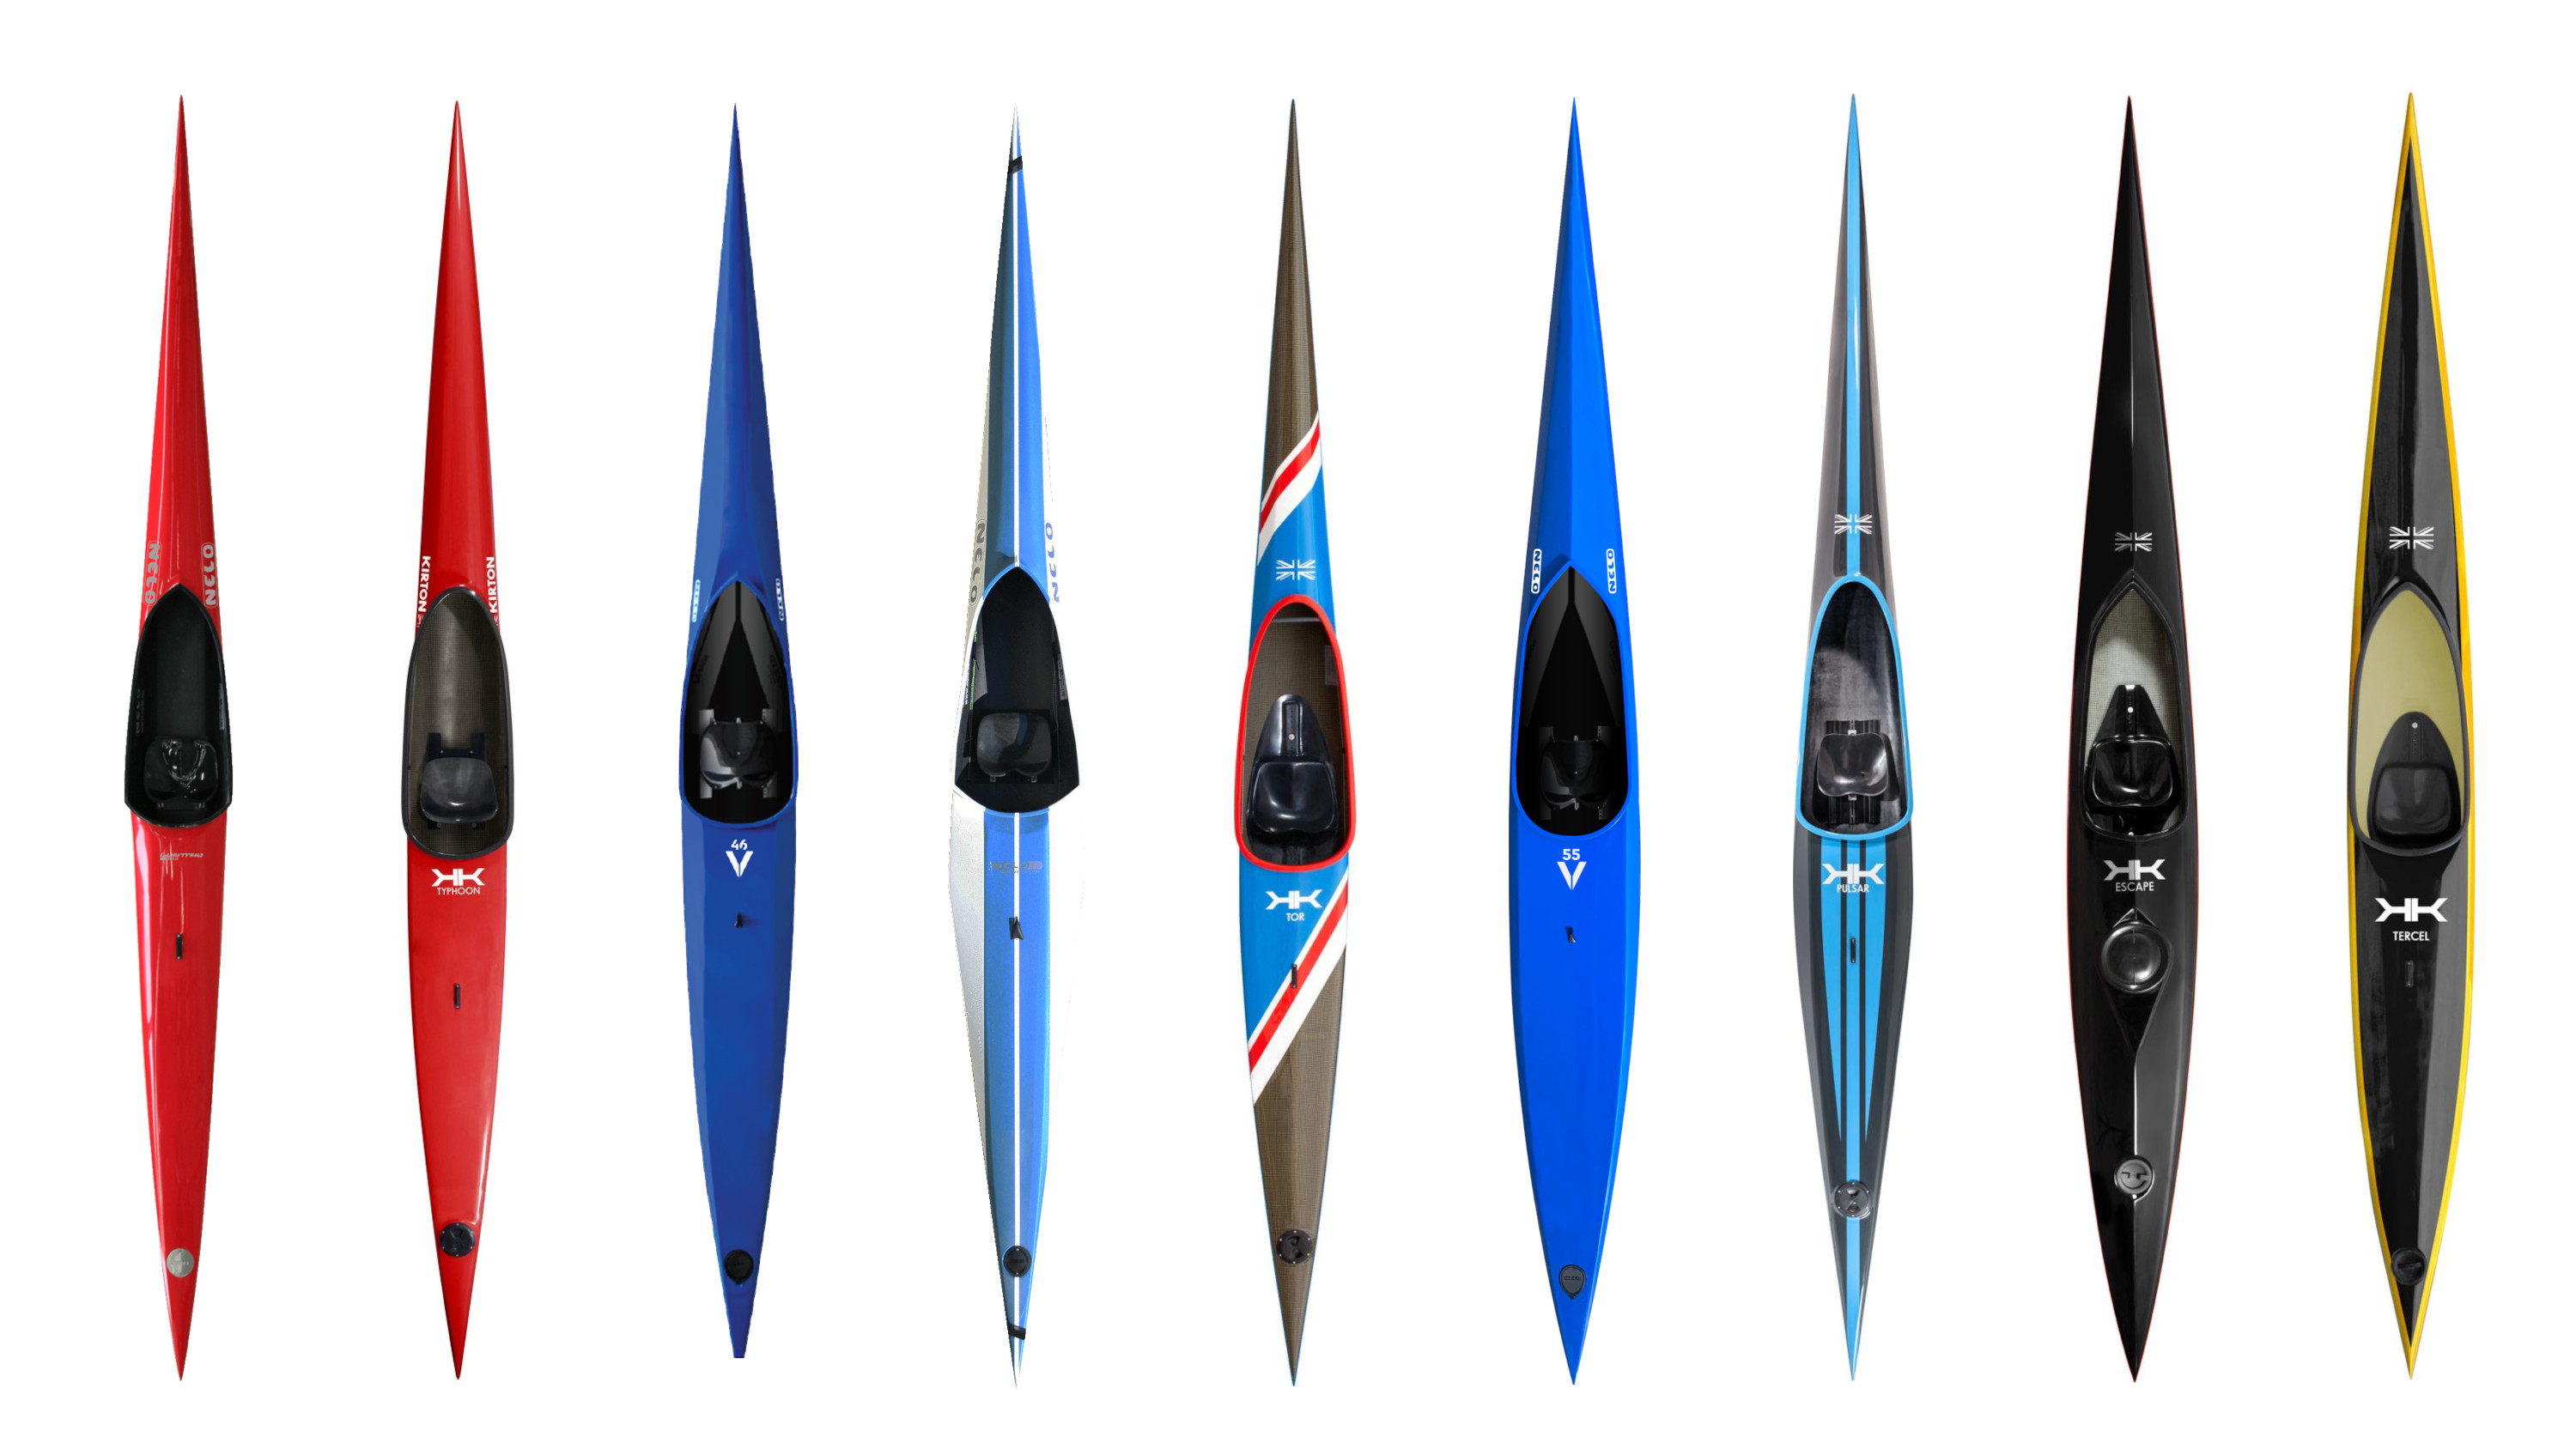
The data in the table below gives (manufacturer) specifications for a selection of kayaks and canoes. The data were originally compiled from two sources:
The data has been revised and expanded to include other manufacturers and more recent models. It has also been cleaned to some extent, but there is still work to be done. Please let me know if you spot any errors or omissions.